
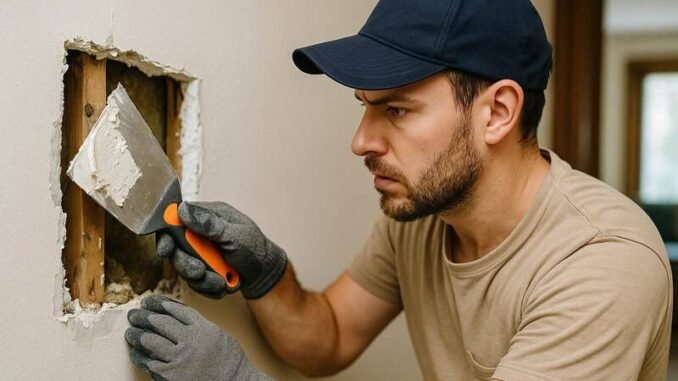
Doorknob holes, accidental elbow-through-the-wall moments, the aftermath of a removed wall anchor — drywall damage is inevitable, and hiring a handyman for every ding costs $100–$200 a visit. Learning how to patch a hole in drywall like a professional means knowing the right method for the hole size, because the technique that works for a nail hole fails on a fist-sized hole. I’ve patched everything from pinholes to a full doorknob-through-drywall disaster, and the pro methods below produce genuinely invisible repairs. Here’s the size-by-size guide.
Small Holes (Nail Holes, Anchors — Under 1/2″)
The easy ones:
- Push any protruding drywall inward slightly with the handle of a screwdriver.
- Fill with lightweight spackle ($6/tub — DAP Alex Plus or 3M Patch + Primer) using a 2″ putty knife, slightly overfilling.
- Let dry (30–60 minutes for lightweight spackle), sand smooth with 120-grit, wipe dust.
- Prime the spot (spackle absorbs paint differently — unprimed patches flash through the topcoat), then paint. Two thin paint coats blend better than one thick one.
Medium Holes (1/2″ to 6″ — The California Patch)
This is the pro method — no backing board needed, and it’s stronger than it sounds:
- Cut a square around the damage with a drywall saw ($10) — clean edges, slightly larger than the hole.
- Cut a drywall patch 2 inches larger than the hole on each side (same thickness — 1/2″ is standard for walls).
- Flip the patch over and score the back paper 1 inch from each edge; snap off the gypsum, leaving a 1-inch paper flange around a gypsum core sized to the hole. (This is the “California” trick — the paper flange is the tape.)
- Test-fit, then apply joint compound around the hole edges and press the patch in — gypsum core fills the hole, paper flange bonds to the wall.
- Feather 2–3 thin coats of joint compound over the flange, extending 6–8 inches beyond the patch, drying and lightly sanding between coats. Thin coats — thick ones crack and take forever to dry.
- Sand smooth with 150-grit, prime, paint.
Large Holes (6″+ — Backing Board Method)
- Cut the damage to a clean rectangle spanning stud to stud if possible (screw the patch to studs = strongest repair).
- If not on studs: screw wood backing strips (1×3 furring, $4) inside the hole edges — these give the patch screws something to bite.
- Cut the patch to fit, screw it to studs/backing every 6–8 inches.
- Tape the seams with self-adhesive mesh tape ($6/roll) or paper tape, then 3 thin coats of joint compound, feathered wide (12+ inches for large patches — wide feathering is what makes repairs invisible).
- Sand, prime, paint. For textured walls, match the texture: orange-peel spray ($12/can) for light texture, stomp brush for knockdown — practice on cardboard first.
How Do I Patch a Hole in Drywall Like a Professional? The Invisible-Repair Secrets
- Feather wide: the #1 amateur tell is a patch with a visible hump. Compound should extend 3x the patch width in feathered layers — you’re building a gradual ramp, not a plateau.
- Prime before painting: joint compound is thirstier than drywall — unprimed patches show as dull spots (“flashing”). A $12 quart of PVA drywall primer prevents it.
- Light check: hold a work light at a low angle across the repair — raking light reveals imperfections invisible head-on. Fix them now, not after paint.
- Paint the whole wall if the existing paint is old — touch-up paint almost never matches aged paint exactly (it fades and oxidizes). Corner to corner is the only guaranteed invisible blend.
- Dust control: sanding dust gets everywhere — plastic-sheet the room, wear a mask, and vacuum with a brush attachment between coats.
Total cost per repair: $15–$30 in materials you mostly already own after the first one. The Family Handyman drywall guides are excellent visual companions for the California patch. Thin coats, wide feathering, prime the patch, check with raking light — that’s the difference between “patched” and “what hole?”
Drywall Patching Mistakes to Avoid
- Thick coats of joint compound: thick mud cracks as it dries and takes forever — 2–3 thin coats, feathered wide, drying between. Patience beats volume in drywall work.
- Skipping primer on the patch: joint compound is thirstier than drywall — unprimed patches show as dull “flashed” spots through the topcoat. A $12 quart of PVA primer prevents it.
- Not feathering wide enough: the #1 amateur tell is a patch with a visible hump. Compound should extend 3x the patch width — you’re building a gradual ramp, not a plateau.
- Touch-up painting old walls: aged paint fades and oxidizes — touch-ups almost never match. For invisible repairs on old paint, paint the whole wall corner to corner.
Drywall Patch FAQs
What’s the California patch method?
A self-backing patch for medium holes (1/2″–6″): cut the patch 2 inches larger than the hole, score the back paper to leave a 1-inch paper flange around a fitted gypsum core. The paper flange acts as the tape — no backing board needed, and it’s stronger than it sounds.
How do I match textured walls?
Orange-peel: spray texture in a can ($12) — practice on cardboard first. Knockdown: spray heavier, then flatten lightly with a knockdown knife after 10–15 minutes. Skip-trowel/hand textures: thin joint compound applied with a stipple brush. Texture matching is an art — practice before touching the wall.
How long does joint compound take to dry?
24 hours per coat under normal conditions (longer in humidity/cold). Lightweight spackle (small holes): 30–60 minutes. Setting-type compound (20/45/90-minute): chemical cure, faster — great for same-day multi-coat work, less forgiving to sand.
Can I patch drywall without experience?
Small holes: absolutely — spackle, sand, prime, paint; 30 minutes. Medium holes (California patch): yes with patience — thin coats and wide feathering are the whole skill. Large holes: yes, with backing strips and mesh tape. The skill isn’t talent — it’s thin coats, wide feathering, and primer.
Leave a Reply