
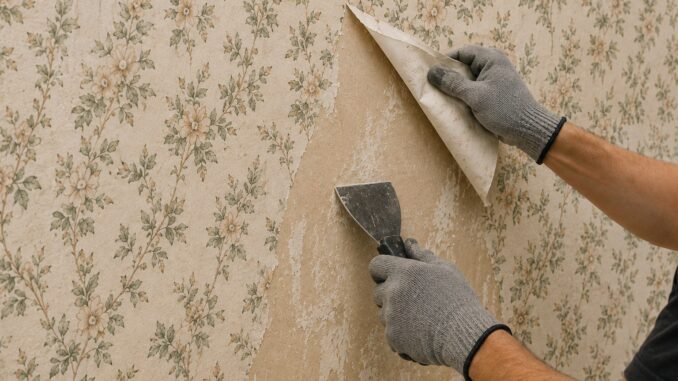
Removing wallpaper is the home-improvement equivalent of a trust fall — terrifying until you learn the technique, then weirdly satisfying. The fear is legitimate: rip it wrong and you take drywall paper with it, turning a weekend project into a skim-coating nightmare. But learning how to remove wallpaper without damaging the walls is mostly about patience and moisture, not strength. I’ve stripped five rooms of various wallpapers (including 1970s foil horrors), and the method below has never damaged a wall. Here’s the full process.
Step 1: Identify Your Wallpaper Type
Find a loose corner (behind a switch plate is a good test spot) and peel:
- Peel-and-stick / strippable: comes off in full sheets, dry. Congratulations — you’re done in an hour. Just peel slowly at a low angle.
- Traditional paper with dry-strippable top layer: the decorative face peels off, leaving a papery backing. Peel the face, then deal with the backing (Step 3).
- Vinyl-coated: the vinyl face peels or needs scoring; the backing needs moisture to release.
- Old-school paper (pre-1990s): bonded directly, often over unprimed drywall — the hardest case. Maximum patience required.
- Grasscloth / fabric: pulls off in strips but leaves heavy adhesive; needs thorough washing after.
Step 2: Prep the Room (30 Minutes That Save Hours)
- Turn off power to outlets and switches on those walls at the breaker — you’ll be using water/steam near them. Remove cover plates.
- Lay drop cloths or old towels along the baseboards — soggy wallpaper backing makes a spectacular mess.
- Have ready: scoring tool ($10 — Paper Tiger), 3–6″ putty knife (plastic first, metal if needed), pump sprayer ($15 — far better than a spray bottle), and a ladder.
- Test for primed drywall: if the wall under a test patch is glossy/painted, removal will be easy. If it’s bare brown drywall paper, go extra gentle — that’s the damage-prone scenario.
Step 3: The Removal (Moisture + Patience)
For everything that doesn’t peel dry:
- Score the wallpaper with the scoring tool using light pressure — you’re perforating the surface so moisture penetrates, not gouging the wall. Skip scoring on strippable types.
- Mix your solution: hot water + a squirt of dish soap works; for stubborn paper, add fabric softener (1:3 with hot water) or use a commercial remover like WP Chomp or DIF concentrate ($10–$15). Enzyme-based removers are the pro choice.
- Spray a 3–4 foot section generously with the pump sprayer. Wait 10–15 minutes. This is where patience pays — the adhesive needs time to dissolve.
- Peel/scrape at a low angle with the putty knife. If it resists, re-wet and wait — never force it. Forcing is what damages walls.
- Work top to bottom, one section at a time. Don’t soak the whole room at once.
The steamer option: a wallpaper steamer ($50–$60 to buy, ~$30/day to rent) is the fastest method for large areas or stubborn old paper. Hold the steam plate on a section for 10–15 seconds, then scrape. It’s dramatically faster — a whole room in 3–4 hours — but keep the steamer moving; lingering in one spot can soften drywall.
How Do I Remove Wallpaper Without Damaging the Walls? The Critical Don’ts
- Don’t dry-scrape aggressively — if it’s not releasing, it needs more moisture/time, not more force.
- Don’t gouge with metal scrapers on the first pass — start plastic, escalate only if needed.
- Don’t soak unprimed drywall excessively — the brown paper face bubbles and tears when saturated. Light misting, more patience.
- Don’t skip the wash: after removal, wash walls with TSP substitute ($8) and rinse — leftover adhesive bleeds through new paint and causes peeling.
After: Prepping for Paint
Once clean and dry (24–48 hours): fill any dings with spackle, sand lightly, and apply a high-quality primer — Zinsser Bulls Eye 1-2-3 or Roman wallpaper primer if any adhesive residue remains. Then paint normally. The This Old House wallpaper guides confirm what pros know: 80% of a good paint job over old wallpaper is in the prep. Budget 4–8 hours per average room for removal, and put on a podcast — it’s meditative once you find the rhythm.
Wallpaper Removal Mistakes to Avoid
- Dry-scraping aggressively: if wallpaper resists, it needs more moisture and time, not more force. Forcing tears the drywall paper face — turning a removal job into a skim-coating project.
- Soaking unprimed drywall: bare brown drywall paper bubbles and tears when saturated. On unprimed walls: light misting, more patience, and minimal steamer dwell time.
- Skipping the wall wash after: leftover adhesive bleeds through new paint and causes peeling. Wash with TSP substitute and rinse — the step everyone wants to skip and no one should.
- Not turning off the power: you’re spraying water near outlets and switches. Flip the breaker, remove cover plates, and work safely — 30 seconds of caution.
Wallpaper Removal FAQs
How long does it take to remove wallpaper from a room?
4–8 hours for an average room with traditional wallpaper (scoring + wetting + scraping). Peel-and-stick: 1–2 hours. A steamer ($50–$60 to buy, ~$30/day to rent) cuts traditional removal to 3–4 hours — worth it for multiple rooms.
Can I paint over wallpaper instead?
Sometimes: if it’s tightly adhered, untextured, with no peeling seams — prime with oil-based or shellac primer (water-based reactivates the paste), skim-coat the seams, then paint. But texture and seams telegraph through — removal gives the better result whenever feasible.
What if the drywall paper tears during removal?
Small tears: seal with oil-based or shellac primer (prevents bubbling), skim-coat with joint compound, sand, prime, paint. Large damaged areas: skim-coat the whole wall. It’s fixable — just annoying, which is why gentle + wet beats fast + forceful.
How do I remove the last bits of backing paper?
Re-wet and wait — backing releases with a second application of hot water + fabric softener solution and 10 more minutes. A plastic scraper (not metal) takes it off without gouging. Stubborn spots surrender to the steamer.
Leave a Reply