
Ask a room of new gardeners when to start and you will hear a dozen confident dates, all different, most of them right for the speaker’s town and wrong for yours. Garden timing has no single date because a garden runs on three clocks at once. Learn to read those three clocks and the calendar stops being a puzzle. Every month of the year gets a clear job, including the month you are reading this in. That rhythm of steady, homegrown food is the heart of the kitchen garden tradition, and it has always worked this way: small, regular, timed to the seasons rather than to enthusiasm.
The three clocks that set every date
Clock one is your frost dates. Your average last spring frost marks the line after which tender plants can usually go outside safely, and your average first autumn frost marks the far end of the season. Usually is the honest word. These dates are averages built from past years, not guarantees, so treat them as planning lines and watch the forecast in the weeks around them. A late cold snap can still arrive, and a warm spring can tempt you out too early.
Clock two is your climate zone. Your zone describes how cold your winters get and, with your frost dates, the broad shape and length of your growing season. You can look up hardiness zones and frost dates for your own address through the USDA zone map and your local extension service, and that lookup, not any national chart, is what should drive your planting calendar. Two towns in the same state can sit weeks apart. Method matters more than any printed date: find your zone, find your two frost dates, write them down, and count forwards and backwards from them for everything that follows.
Clock three belongs to each plant. Vegetables split into two camps. Cool-season crops such as lettuce, peas, carrots, and broccoli thrive in roughly 40 to 70 degree weather. They like spring and autumn and sulk in summer heat. Warm-season crops such as tomatoes, peppers, beans, and squash want soil at 70 degrees and up, with warm nights to match. Put a tomato out too early and it does not grow faster. It sits, chilled and stalled, while a later-planted one overtakes it. Match the plant’s clock to the other two and most timing mistakes disappear.
Winter: plan, order, and test
Winter is working season, just indoors. Plan the beds on paper, decide what your household actually eats, and order seeds early, because the best and most popular varieties sell out by March. Waiting until the first warm weekend to shop means planting whatever is left on the rack, which is a poor way to choose a season of food.
Use the quiet months to build or repair beds while lumber and time are both easier to find than in the spring rush. Start onions and leeks indoors late in winter, since they grow slowly and need the head start. Above all, take a soil test through your county extension office, roughly $15 to $30. It tells you your soil’s acidity and nutrient levels and what to add, in plain amounts. Of everything a beginner can buy, that test is the highest-value purchase, because every later decision about feeding and liming rests on it.
Early spring: the cool-season opening
As the ground becomes workable, the cool-season crops go out, many of them weeks before the last frost, because they welcome cold soil and light frost. Peas, lettuce, carrots, and broccoli belong in this window. Sow in small batches rather than one long row, so harvests arrive in a stream instead of a single glut.
Early spring is also indoor season for the warm camp. Start tomatoes and peppers indoors about 6 to 8 weeks before your last frost date, counting back from the date you wrote down from clock one. They need warmth to germinate and strong light to grow sturdy rather than leggy. A sunny sill is often not enough light. A simple lamp close above the seedlings keeps them compact. Harden young plants off gradually before transplanting, a few hours more outside each day, so the move is not a shock.
Late spring: the warm-season handover
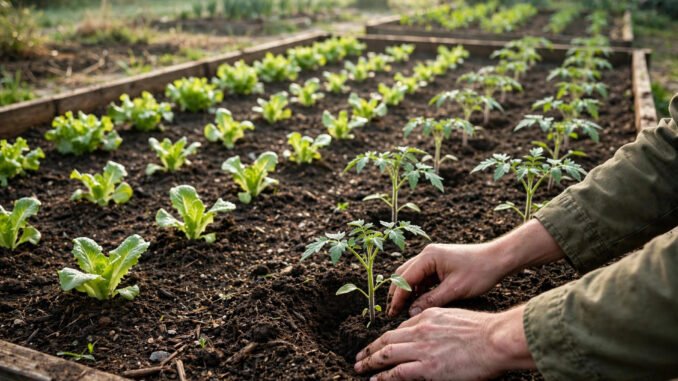
After the last frost, once the soil is genuinely warm and nights have settled, the warm-season transplants go out: tomatoes, peppers, squash, and cucumbers, with beans sown directly into the warm ground. Genuinely warm is the test that matters. Push a finger into the soil in the morning. If it feels cold, wait. A week of patience here buys stronger plants than a week of early bravado.
Raised beds earn their keep in this phase. They warm earlier in spring and drain faster after heavy rain, which can give you a small head start on in-ground planting. The trade runs the other way too, covered below: beds cost more to build and fill. In this window, feed the calendar, not your impatience, and keep some spare seedlings or a packet of quick seed in reserve in case a late cold night takes a few plants.
Summer: succession and mulch
Summer work is mostly rhythm. Sow beans and greens every few weeks in small batches, a habit called succession sowing, so something is always coming ready as something else finishes. One big sowing gives you one big week of harvest and then a gap. Small repeated sowings give you dinner.
Mulch everything. Spread about 3 inches of straw or wood chips over bare soil around your plants. Mulch holds moisture through hot spells, keeps weeds down, stops soil splashing onto leaves, and slowly feeds the soil life as it breaks down. Water deeply and less often rather than lightly every day, so roots chase moisture downwards. Harvest young and often: beans, zucchini, and greens all produce more when picked regularly, and a zucchini left two days too long becomes a club nobody wants to eat.
Late summer and fall: the second cool season
As heat eases, the cool camp returns for a second run. Sow greens, carrots, and broccoli again in late summer for autumn harvests. Many gardeners find this the most pleasant season in the garden: fewer pests, cooler working weather, and greens that taste sweeter after a touch of cold.
Count backwards from your first autumn frost to judge what still has time to mature, using the days-to-harvest printed on each seed packet. Fast crops fit easily. Slow ones are a gamble you can take with spare space and low expectations. Where winters allow, plant garlic in fall for harvest the following year, one of the most satisfying low-effort crops there is. Clear spent plants to the compost, sow a cover crop or mulch bare beds, and note what worked while you still remember it honestly.
The first garden that succeeds
Keep the first garden small on purpose: one 4 by 8 foot raised bed, or a small in-ground plot of similar size. That space grows a surprising amount of food and stays manageable in about 2 to 3 hours a week. A garden you can tend fully teaches you more, and feeds you better, than a large plot that slides into weeds by July and teaches you only guilt.
Plant what you actually buy. Tomatoes, peppers, cucumbers, and the herbs your kitchen uses weekly will get eaten, which keeps motivation built in. Novelty crops are fun in year two. In year one they crowd out staples and often end up uneaten. A helpful place to start choosing is the best plants for beginners with no gardening experience, and from that kind of list, the most forgiving picks are cherry tomatoes, zucchini, bush beans, lettuce, radishes, which are ready in about 30 days, and common herbs such as basil. One rule stands without exception: mint always goes in a container, never in open ground, because mint spreads aggressively and will take over a bed. Always in a container.
On beds versus ground, decide with your soil and budget. A raised bed warms earlier, drains well, and gives you clean, deep soil from day one, which matters on heavy or rubble-filled ground. In-ground planting is cheaper and can be as large as you like, and suits good native soil well. Neither choice is wrong. Forcing good plants into bad soil with no amendment is the only real error here.
Costs, and what the garden gives back
Print the starter costs plainly. A raised-bed start runs roughly $100 to $300 all in: lumber or a kit, soil, compost, seeds, and basic tools. Filling a 4 by 8 bed with bought soil and compost accounts for roughly $50 to $100 of that total. An in-ground start runs roughly $50 to $100, mostly seeds, compost, and a few tools, since the soil is already there and needs amendment rather than replacement.
On savings, keep the claim hedged and honest. A productive small bed can offset a few hundred dollars a year of produce, with $200 to $600 a reasonable hedged range, for a household that genuinely eats what it grows. Grow food nobody eats and the saving is zero, however fine the plants look. The garden also pays in freshness and in knowing exactly what went on your food, which never shows in the grocery maths. Start with the clock method, one small bed, and crops your kitchen already loves, and let the first season teach you your own ground. Next year’s calendar will be written from experience, not from a chart, and that is when gardening starts to feel easy.
Leave a Reply