
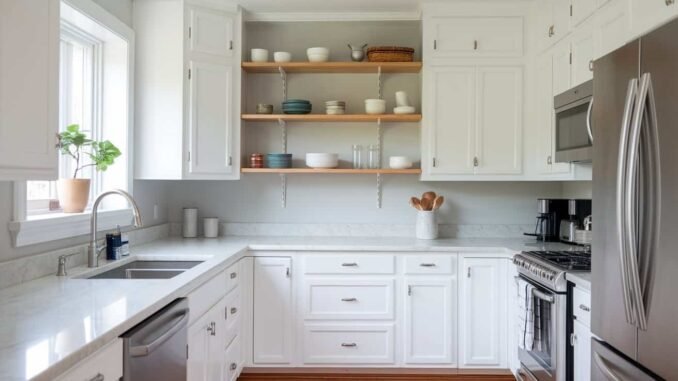
Full cabinet replacement runs $8,000–$20,000+ — but in most kitchens, the cabinet boxes are perfectly fine and it’s the doors, color, and hardware that look dated. Learning how to refresh kitchen cabinets without replacing them can deliver 80% of the visual transformation for 10–20% of the cost. I’ve done the full cabinet paint job twice now, and both kitchens went from “needs a gut renovation” to “wait, you didn’t replace these?” Here’s every option, ranked by cost and impact.
Option 1: Paint Them ($150–$400 — Highest ROI)
Cabinet painting is the undisputed value champion. The process that actually lasts:
- Remove doors, drawers, and hardware. Label everything with painter’s tape (door positions matter — hinges are adjusted per door).
- Degrease thoroughly with TSP substitute — kitchen cabinets have years of cooking grease bonded to them. Paint won’t stick to grease. This step determines success or failure.
- Scuff-sand with 120-grit (you’re roughing the surface, not stripping it) and wipe clean.
- Prime with a bonding primer (Zinsser BIN shellac or STIX) — regular primer peels off slick cabinet finishes; bonding primer doesn’t.
- Paint 2–3 thin coats of cabinet-specific paint — Benjamin Moore Advance or Sherwin-Williams Emerald Urethane ($55–$75/gallon). These level smooth and cure hard like factory finishes. Thin coats; thick ones drip and stay soft.
- Cure 2–3 weeks before heavy use — the paint feels dry in hours but reaches full hardness over weeks. Be gentle at first.
Total: a weekend of work plus curing time, under $400. Color picks that always work: warm white (brightens everything), deep navy or forest green on lower cabinets with white uppers (the designer two-tone), or soft greige for warmth.
Option 2: New Hardware ($50–$150 — Fastest Win)
If the cabinets are already a decent color, hardware alone transforms them. Swap dated knobs for matte black bar pulls or brushed brass ($2–$5 each). Two hours, one screwdriver, dramatic difference. Pro tip: if hole spacing differs, use a $10 cabinet hardware jig for perfect alignment — crooked handles scream DIY.
Option 3: Reface ($3,000–$8,000 — The Middle Path)
Refacing keeps the boxes and replaces doors, drawer fronts, and veneers the visible frame. You get genuinely new-looking cabinets in new styles and colors for 40–60% less than replacement. Worth it when: boxes are solid, you want a different door style (shaker instead of arched), but the layout works. Not worth it when: boxes are damaged or you want layout changes — then just replace.
How Can I Refresh My Kitchen Cabinets Without Replacing Them? The Finishing Touches
- Under-cabinet lighting ($25–$50 for LED strips): makes new-looking cabinets glow and the whole kitchen feel expensive. The highest “wow per dollar” after paint.
- Remove a few upper doors for open shelving — free, trendy, and breaks up a wall of cabinets (keep it to 1–2 cabinets, styled intentionally).
- New hinges ($3–$6 each — soft-close): the daily luxury you didn’t know you needed. Soft-close drawers feel premium instantly.
- Crown molding on uppers ($50–$100 in material): bridges the gap to the ceiling and makes stock cabinets look custom.
- Deep clean + touch-up: sometimes “dated” is just “dirty” — a thorough degrease and furniture markers ($10 set) on nicks buys surprising improvement for $10.
The This Old House cabinet guides confirm what refinishers know: prep is 80% of a lasting paint job. Degrease like you mean it, bonding primer, cabinet-grade paint, thin coats — follow that sequence and your $300 paint job will look like a $15,000 cabinet replacement to everyone who walks in.
Cabinet Refresh Mistakes to Avoid
- Skipping the degrease: kitchen cabinets carry years of cooking grease — paint over it and it peels within months. TSP substitute + thorough scrub is the step that determines success or failure.
- Regular primer on slick finishes: standard primer peels off glossy cabinet finishes. You need bonding primer (Zinsser BIN shellac or STIX) — it’s engineered for adhesion to slick surfaces.
- Thick coats of cabinet paint: thick paint drips, sags, and stays soft — cabinet paint needs 2–3 thin coats to cure hard like a factory finish. Thin is strong; thick is weak.
- Using cabinets before full cure: paint feels dry in hours but reaches full hardness over 2–3 weeks. Heavy use in week one dents and chips the soft finish. Be gentle at first.
Cabinet Refresh FAQs
What’s the best paint for kitchen cabinets?
Benjamin Moore Advance or Sherwin-Williams Emerald Urethane ($55–$75/gallon) — cabinet-specific formulas that level smooth and cure hard. Regular wall paint stays soft and chips on cabinets. The paint choice makes or breaks the project.
Should I spray or brush cabinets?
Spraying (HVLP or airless) gives the smoothest factory-like finish — but requires masking the entire kitchen and practice. Brushing + foam roller with self-leveling paint (Advance) gets 90% of the way there with far less setup. Beginners: brush.
How long do painted cabinets last?
8–12 years with proper prep (degrease + bonding primer + cabinet paint + thin coats). High-wear areas (around handles, trash pullout) may need touch-ups at year 5–7 — keep a labeled leftover jar.
Paint, reface, or replace?
Paint ($150–$400): boxes and doors solid, just dated color. Reface ($3,000–$8,000): want a different door style, boxes solid, layout works. Replace ($8,000–$20,000+): damaged boxes, layout changes, or you want all-new everything. 80% of kitchens only need paint.
Two-Tone Cabinets: The Designer Move
The two-tone cabinet trend (dark lowers + white uppers, or colored island + neutral perimeter) is the highest-impact cabinet refresh short of replacement — and it’s free if you’re painting anyway. The formula: deep navy, forest green, or charcoal on lower cabinets/island (grounds the room, hides wear), warm white on uppers (keeps it airy). Test the combination with sample pints on actual doors — colors interact with your light and counters, not the Pinterest photo’s. Keep the ratio roughly 60/40 (dominant neutral, accent color) to avoid visual chaos. And carry the accent somewhere else in the room (bar stools, a runner, open-shelf styling) so it looks intentional, not accidental. Two-tone done right looks like a $20,000 designer kitchen; done wrong looks like you ran out of paint.
Leave a Reply