
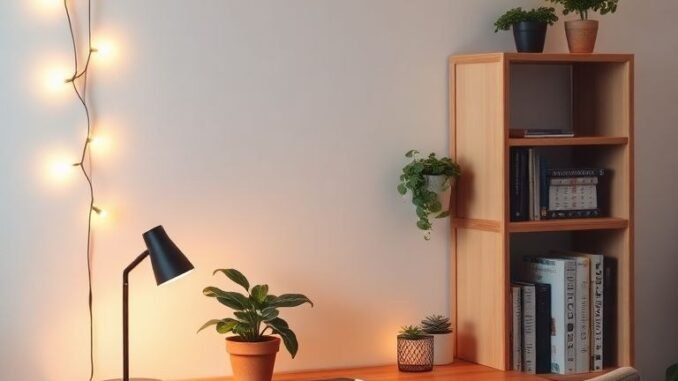
Bad home-office lighting gives you headaches, eye strain, and that washed-out zombie look on video calls. The best lighting for a home office setup isn’t one perfect lamp — it’s layers: ambient, task, and video light working together. I rebuilt my office lighting last year after months of 4 p.m. headaches, and the difference was immediate. Total cost: about $120. Here’s the formula.
Layer 1: Ambient Light (The Base)
Your room needs even, shadow-free general light. The enemy is a single overhead light behind you (creates screen glare) or directly above (harsh shadows on your face for calls).
- Overhead: a flush-mount or semi-flush fixture with a diffuser (frosted, not clear glass) — $40–$80. Bright but soft.
- Color temperature: 4000K is the productivity sweet spot — neutral white that’s alert without feeling clinical. (2700K is cozy-evening; 5000K+ feels like a laboratory.)
- Brightness: aim for the room to feel evenly lit with no dark corners — dark surroundings force your eyes to constantly adjust between bright screen and dark room, causing fatigue.
Layer 2: Task Light (Your Desk)
A dedicated desk lamp for paperwork, reading, and keyboard work:
- Position: to the side of your dominant hand’s opposite — left side if you’re right-handed — so your hand doesn’t cast shadows on your work. About 15–20 inches from the task.
- Asymmetric or architect lamps ($30–$60 — BenQ, TaoTronics, IKEA Tertial) let you aim light precisely where needed.
- Brightness: 400–800 lumens at the desk surface. Dimmable is worth the extra $10 — you’ll want less light for screen-heavy work, more for paperwork.
- Avoid: bare bulbs at eye level, and lamps that reflect in your monitor. If you see the lamp in your screen, move it.
Layer 3: Video Call Light (Face the Window)
This is the layer most people miss, and it’s what separates “professional” from “hostage video”:
- Best free option: face a window. Natural daylight on your face is more flattering than any ring light. Position your desk facing the window (not with the window behind you — that’s the silhouette mistake).
- No good window? A $25–$40 LED panel or ring light at eye level, slightly to the side, at 4000–4500K. Don’t blast it at full power — 50–70% looks natural.
- Background: light your background too — a small lamp or LED strip behind you prevents the “floating head in darkness” effect.
What Is the Best Lighting for a Home Office Setup? The Anti-Glare Rules
- Monitor perpendicular to windows — never facing a window (glare) or with your back to one (you become a silhouette on calls).
- Bias lighting: a $15 LED strip behind your monitor reduces eye strain dramatically by softening the contrast between bright screen and dark wall. This is the single best $15 in office ergonomics.
- No overhead light directly above the monitor — it creates screen reflections. Offset it or rely on lamps.
- Smart bulbs (Philips Hue, $15–$25/bulb) let you shift from cool/bright during work hours to warm/dim in the evening — your circadian rhythm will thank you.
The $120 Office Lighting Makeover
Here’s the exact budget build: LED strip behind monitor ($15) + architect desk lamp ($40) + 4000K bulbs for existing fixtures ($15 for a 4-pack) + small video light ($30) + smart plug or dimmer ($20). The result: no more afternoon headaches, no more screen glare, and you look like you have your life together on Zoom. The Illuminating Engineering Society recommends 300–500 lux at the desk for office work — but honestly, if your eyes feel relaxed at 5 p.m. and your face isn’t in shadow on calls, you’ve nailed it.
Home Office Lighting Mistakes to Avoid
- One overhead light doing everything: a single ceiling fixture creates harsh shadows, screen glare, and video-call horror. Lighting needs layers — ambient + task + video light, each doing its job.
- Sitting with your back to the window: the #1 video-call mistake — the camera exposes for the bright window and you become a silhouette. Face the window (free perfect key light) or get a $30 LED panel.
- 5000K+ “daylight” bulbs everywhere: ultra-cool bulbs feel clinical and harsh for 8-hour days. 4000K is the productivity sweet spot; reserve 5000K+ for task-specific needs.
- Bright screen in a dark room: the contrast between screen and dark surroundings causes the most eye fatigue. A $15 LED bias strip behind the monitor fixes it instantly.
Home Office Lighting FAQs
What’s the best color temperature for a home office?
4000K — neutral white that’s alert without feeling sterile. 2700–3000K is too cozy (signals “evening” to your brain); 5000K+ is harsh for all-day exposure. Smart bulbs ($15–$25) let you run 4000K by day and shift warm in the evening.
How do I stop getting headaches from my office lighting?
The usual culprits: flickering fluorescents (replace with LED), screen glare (reposition lamps/monitor), and bright-screen-dark-room contrast (add bias lighting + ambient light). Fixing all three eliminated my own 4 p.m. headaches completely.
Do I need a ring light for video calls?
Not necessarily — a window in front of you beats any ring light for free. No good window? A $25–$40 LED panel at eye level works as well as a ring light with less “influencer” harshness. Light your background too — a lamp behind you prevents the floating-head effect.
How bright should my office be?
The Illuminating Engineering Society recommends 300–500 lux at the desk. Practically: the room should feel evenly lit with no dark corners, and you shouldn’t squint at paperwork or see lamp reflections in your monitor.
The $50 Emergency Upgrade Path
Overwhelmed? Do these three things this week for under $50 total: 1) a $15 LED strip behind your monitor (bias lighting — the single biggest eye-strain reducer), 2) swap your bulbs to 4000K ($15 for a 4-pack — the productivity color temperature), and 3) move your desk to face the window (free — the best video-call light in existence). These three changes fix 80% of home-office lighting complaints: the headaches, the glare, the zombie-on-Zoom look. Everything else — architect lamps, smart bulbs, panel lights — is refinement. Start with the $50 trio, live with it a week, and you’ll know exactly which refinement (if any) you actually need.
Leave a Reply