
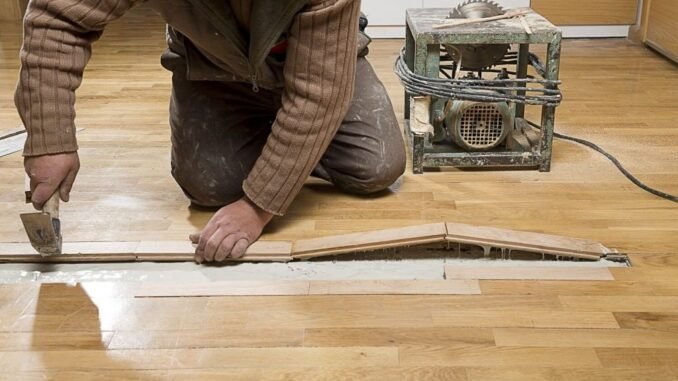
Squeaky floors are the soundtrack of old houses — charming to visitors, maddening at 2 a.m. when you’re sneaking to the kitchen. The good news: learning how to fix squeaky hardwood floors yourself is very doable, because squeaks have a simple cause. Wood is rubbing against wood (or against a nail) — subfloor against joist, or floorboard against floorboard. Stop the movement, stop the squeak. Here’s how, whether you can access the floor from below or not.
Quick Fixes (No Tools, 10 Minutes)
Try these first — they solve minor squeaks surprisingly often:
- Talcum powder or powdered graphite: sprinkle generously over the squeaky area, work it into the seams with a cloth or soft brush, then walk on it to work it deeper. The powder lubricates the wood-on-wood friction. Wipe up excess. Costs ~$5, takes 10 minutes, and works on maybe 40% of minor squeaks.
- WD-40 in the seams: a quick spray into the joint can quiet things temporarily. It’s a band-aid, not a fix — but useful for diagnosing which board squeaks before you commit to hardware.
Fixing From Above (No Basement Access)
Most people fix squeaks from above. The pro tool for this is a squeak-repair kit ($20–$30 — the Squeeeeek No More kit is the famous one):
- Locate the joist under the squeak (stud finder, or look for nail patterns in the floor).
- Position the kit’s jig over the joist and drive the special scored screw through the floor into the joist — it pulls the subfloor tight to the joist.
- The screw snaps off below the surface automatically, leaving a tiny hole.
- Fill with color-matched wood filler ($8), sand lightly, touch up finish if needed.
Alternative without the kit: drill a pilot hole and drive a #8 trim-head screw (thin head, easy to hide) through the floor into the joist, countersink slightly, fill and finish. Same principle, slightly more visible. Either way: always screw into the joist, not just the subfloor — that’s what stops the flex.
Fixing From Below (Basement or Crawl Space Access)
If you can get under the floor, you have the best options — all invisible:
- Shims: have someone walk above while you’re below; when you hear the squeak, tap a wood shim ($5/bag) coated in construction adhesive into the gap between joist and subfloor. Don’t force it — a tight shim stops movement; an over-driven shim creates a new squeak.
- Sister blocking: screw a 2×4 block alongside the joist, tight against the subfloor, with construction adhesive + screws. Rock solid.
- Squeak-Ender plates ($15–$20 each): steel plates that bolt to the joist and pull the subfloor down with a screw. Extremely effective for widespread squeaks.
- Construction adhesive alone: run a bead of subfloor adhesive along the joist-subfloor joint where accessible. Simple and permanent.
How Do I Fix Squeaky Hardwood Floors Myself? Diagnosing First
Before you fix, diagnose — different squeaks need different fixes:
- Walk the floor barefoot and mark every squeak with painter’s tape. Squeaks cluster; you may find one joist bay causing five squeaks.
- Subfloor-on-joist squeak: rhythmic, underfoot, worse in dry winter months (wood shrinks, gaps grow). Fix with screws/shims as above.
- Board-on-board squeak: higher-pitched, at the seams. Powder or a thin bead of wood glue worked into the seam often fixes it.
- Whole-floor systemic squeaking: if the entire floor squeaks, the subfloor may be inadequately fastened — a bigger job, possibly worth a flooring contractor’s assessment ($0–$100 for an estimate).
One honest note: humidity control helps enormously. Wood shrinks in dry winter air, opening gaps that squeak. Keeping indoor humidity at 35–50% with a humidifier ($40–$100) prevents new squeaks from forming — the National Wood Flooring Association recommends exactly this range for hardwood health. Fix the existing squeaks with screws and shims, stabilize the humidity, and your midnight kitchen trips go back to being silent.
Squeaky Floor Mistakes to Avoid
- Fixing from above without hitting the joist: screws into subfloor only (missing the joist) do nothing — the subfloor still flexes. Always anchor into the joist; use a stud finder and verify.
- Over-driving shims from below: a shim hammered too aggressively lifts the subfloor and creates a new squeak (or a hump). Snug, not forced — with construction adhesive for permanence.
- Treating the symptom across the whole floor: if every board squeaks, the subfloor is inadequately fastened — spot-fixing is whack-a-mole. Systemic squeaking needs a flooring contractor’s assessment.
- Ignoring humidity: wood shrinks in dry winter air, opening the gaps that squeak. A $40–$100 humidifier keeping indoor humidity at 35–50% prevents new squeaks from forming.
Squeaky Floor FAQs
Why do floors squeak more in winter?
Wood shrinks as indoor humidity drops in heating season — shrinking opens tiny gaps between subfloor and joists (or between boards), and gaps = movement = squeak. It’s physics, not structural failure. Humidification to 35–50% minimizes it.
Can I fix squeaks in carpeted floors?
Yes — the Squeeeeek No More kit ($20–$30) includes a fixture that drives scored screws through carpet; the screw snaps below the surface and carpet fibers hide the hole. Works surprisingly well.
Will the talcum powder fix last?
Months, sometimes longer — it’s a lubricant, not a structural fix. For minor board-on-board squeaks it’s genuinely effective; for subfloor-on-joist movement, it’s a temporary quieting until you screw or shim properly.
When should I worry a squeak is structural?
Bouncy or spongy feel underfoot (not just noise), visible sagging, squeaks accompanied by cracks in walls/ceilings, or a sudden new squeak in a previously silent floor. Noise alone is almost never structural; movement + noise deserves a professional look.
Preventing Squeaks in New Floors
Installing new hardwood? Squeak prevention is 10x cheaper than squeak repair. The pro protocol: construction adhesive on every joist before laying subfloor, screws (not just nails) every 6–8 inches into joists, staggered subfloor seams (never four corners meeting), and proper acclimation (flooring sits in the house 5–7 days before install so it stabilizes to indoor humidity). For the finish floor: cleats or staples per manufacturer spec, and maintain 35–50% indoor humidity year-round. A floor installed this way simply doesn’t squeak — the subfloor can’t move against the joists because it’s glued and screwed. If your installer suggests skipping the adhesive to save $100 in glue, get a different installer.
Leave a Reply