
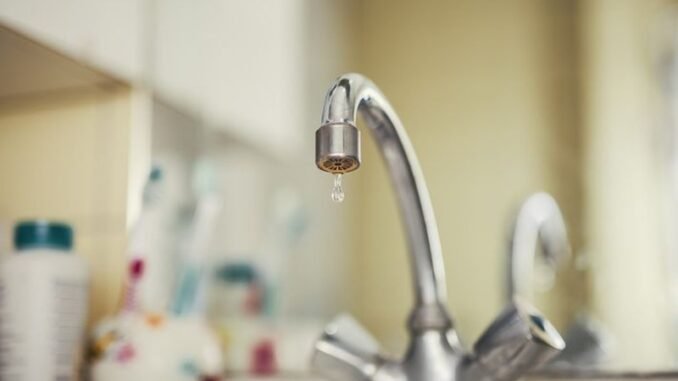
A leaky faucet can waste 3,000+ gallons a year — that’s the drip-drip-drip keeping you up at night, literally money down the drain. Here’s the good news: learning how to fix a leaky faucet without calling a plumber is one of the easiest DIY plumbing wins there is. Most faucet leaks are a worn cartridge, washer, or O-ring — a $5–$15 part and about 30 minutes of work. Plumbers charge $150–$350 for this same job. Let’s keep that money.
What You’ll Need (Under $20)
- Adjustable wrench or basin wrench
- Phillips and flathead screwdrivers
- Replacement cartridge/washer/O-ring kit ($5–$15 at Home Depot — bring the old part to match it)
- Plumber’s grease (small tube, ~$4)
- White vinegar and an old toothbrush (for mineral buildup)
- A towel or rag to plug the drain (non-negotiable — screws love drains)
- Your phone — photograph every step as you disassemble
Step 1: Shut Off the Water
Look under the sink for the hot and cold shutoff valves — turn both clockwise until they stop. No valves? Shut off the main water supply to the house (usually near the water meter or where the main line enters). Turn the faucet on to release pressure and confirm the water’s off. Then plug the drain with your towel. I mean it — this step saves more DIYers than any other.
Step 2: Identify Your Faucet Type
The fix depends on the type. The four common ones:
- Cartridge faucet (most modern single-handle faucets — Moen, Delta): the cartridge is the culprit 90% of the time. Pull the handle, remove the retaining clip/nut, swap the cartridge. Easiest fix.
- Ball faucet (single-handle, common in kitchens — older Delta): buy a repair kit ($10–$20) with replacement springs, seats, and O-rings. Slightly fiddly but very doable.
- Compression faucet (two separate hot/cold handles, older homes): the rubber washer at the bottom of the stem wears out. Unscrew the handle, remove the stem, replace the washer. Classic, simple.
- Ceramic-disk faucet (single lever, high-end): incredibly durable; if it leaks, the seals need replacing or the disks need cleaning. Least common DIY.
How to Fix a Leaky Faucet Without Calling a Plumber: The Actual Repair
For the most common case — a cartridge faucet:
- Pry off the decorative cap on the handle (flathead screwdriver) and remove the handle screw.
- Lift off the handle, then remove the dome cap and retaining nut/clip.
- Pull the old cartridge straight out. Note its orientation — the new one goes in exactly the same way.
- Take the old cartridge to the store to match it exactly, or order by faucet brand and model.
- Apply a thin smear of plumber’s grease to the new cartridge’s O-rings.
- Slide it in, reassemble in reverse order (check your photos), and turn the water back on slowly.
While you’re in there, soak any mineral-crusted parts in white vinegar for 30 minutes and scrub with the toothbrush — hard water buildup causes a surprising number of “mystery” leaks.
When to Actually Call a Plumber
DIY has limits. Call a pro if:
- Water is leaking from under the sink or inside the wall, not the spout — that’s a supply-line issue.
- The shutoff valves are frozen or broken — forcing them can flood your cabinet.
- The faucet is corroded solid and won’t disassemble without risk of breaking the sink or countertop.
- You’ve replaced the cartridge and it still leaks — the valve seat itself may be damaged, which needs reseating tools.
According to the EPA’s WaterSense program, household leaks waste nearly 1 trillion gallons of water annually nationwide — fixing your drip is genuinely good for your wallet and your water bill. Total DIY cost: under $20 and half an hour. Total plumber cost avoided: $150–$350. That’s the best hourly rate you’ll earn all week.
Faucet Repair Mistakes to Avoid
- Forgetting to plug the drain: the #1 DIY plumbing disaster — a tiny screw or clip bounces into the drain and your 30-minute job becomes a P-trap disassembly. Towel in the drain before you touch anything.
- Forcing a corroded part: if a nut won’t budge, penetrating oil + patience beats force. Snapping a corroded supply line or cracking the sink turns a $10 repair into a $300 one.
- Buying the wrong cartridge: cartridges are brand and model specific — “looks close” isn’t close enough. Bring the old cartridge to the store or match the exact model number. A wrong cartridge leaks worse than the old one.
- Overtightening everything: plumbing connections seal with washers and O-rings, not brute force. Overtightening cracks porcelain, strips threads, and deforms washers — causing the very leaks you’re fixing.
Leaky Faucet FAQs
How much water does a leaky faucet actually waste?
A faucet dripping once per second wastes 3,000+ gallons per year — roughly $60–$200 on your water bill depending on local rates. A faster drip or steady trickle multiplies that. The EPA WaterSense program estimates household leaks waste nearly 1 trillion gallons nationally each year.
How do I know what type of faucet I have?
Single handle = cartridge or ball (cartridge if it’s a modern Moen/Delta; ball if it’s an older Delta with a rotating dome). Two handles = compression (separate hot/cold, older) or ceramic disk (single-lever-per-side, newer). When in doubt, photograph it and show the plumbing aisle staff — they identify faucets all day.
Should I repair or replace the whole faucet?
Repair if: the faucet is under 10 years old, the finish is good, and it’s a single failed part. Replace if: it’s 15+ years old, the finish is corroded, parts are discontinued, or this is the third repair — a new $80–$150 Moen or Delta with a lifetime warranty beats endless $12 fixes.
Why does my “fixed” faucet still drip for a while?
Residual water in the spout and aerator drains out for a few minutes after repair — totally normal. If it’s still dripping after 30 minutes, the new part isn’t seating properly (wrong size, debris on the seat, or a damaged valve seat needing professional reseating).
Leave a Reply