
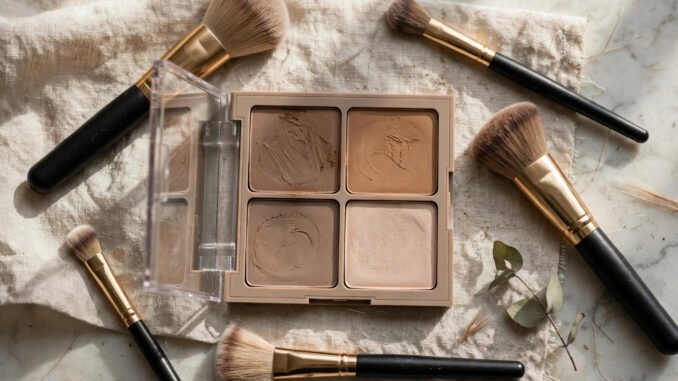
Somewhere between the Instagram makeup artist’s 14-step routine and the “just buy this $60 palette” advice lies the actual question: is understanding contouring basics actually worth it for a beginner? The beauty industry has a financial interest in making contouring seem essential and complicated. The truth is more useful: contouring is an optional, learnable skill that takes about two weeks of practice to grasp — worth learning if you enjoy makeup as a craft, skippable if you don’t. Here’s the honest beginner’s guide, free of product-pushing.
What Contouring Actually Is (Without the Hype)
Contouring uses darker shades to create the illusion of shadow (receding areas) and lighter shades to create the illusion of light (projecting areas). That’s it. It’s theatrical makeup technique — literally borrowed from stage makeup — adapted for everyday faces. It doesn’t change your face; it changes how light appears to hit your face in photos and at a distance.
The honest framing beginners need: contouring is corrective illusion, and like all illusion, it works best when subtle. The heavy, stripe-y contour of 2016-era Instagram reads as makeup in real life — which is fine if that’s the aesthetic you want, but it’s not “natural enhancement.” Modern contouring has moved toward soft sculpting: sheer, blended, believable.
The Only Theory You Need: Light and Shadow
Forget the 12-zone face maps. The principle: dark recedes, light advances. Apply the darker contour shade where you want to minimize or define (hollows of cheeks, jawline, sides of nose, temples, forehead perimeter), and the lighter highlight shade where you want to bring forward (tops of cheekbones, bridge of nose, brow bone, cupid’s bow, chin center). Blend until no lines are visible — unblended contour is just dirt-colored stripes.
Undertone is everything. Real shadows are cool/neutral — so contour shades should be taupe, cool brown, or neutral (not orange). The #1 beginner mistake is contouring with warm bronzer, which reads as “dirty” rather than “shadowed.” Bronzer warms and adds color (a different job); contour sculpts with shadow. They’re different products for different purposes — this distinction alone fixes most bad contour.
Cream vs. Powder: Which Should a Beginner Choose?
Cream contour (sticks, pots): more blendable, more natural finish, more forgiving — mistakes blend away. Better for dry/normal skin. Slightly harder to control placement initially, but the blendability compensates. The beginner recommendation.
Powder contour (palettes): more precise placement, better for oily skin (stays put longer), but less forgiving — harsh lines set fast and don’t blend out easily. Better as a second step (setting cream contour) or for experienced hands.
The beginner method: cream stick, two shades deeper than your skin in a cool/neutral taupe. Draw short strokes (not long stripes) in the hollows of cheeks, blend upward with a damp sponge using bouncing motions. That’s 80% of contouring. Everything else is refinement.
The 5-Minute Beginner Routine
1. Cheeks: suck in slightly to find the hollows, apply contour in the hollow (not on the cheekbone itself — the shadow goes under the bone), blend upward toward the temples. This is the highest-impact placement.
2. Jawline: light strokes along the jawbone, blended downward into the neck (never a harsh jawline stripe — it photographs as a beard shadow).
3. Forehead (optional): only if you want to minimize a larger forehead — blend into the hairline. Skip if your forehead is proportional; unnecessary contouring creates problems that didn’t exist.
4. Nose (advanced, optional): thin lines down the sides, highlight down the center, blend thoroughly. Nose contour is the easiest to get wrong and the most visible when wrong — beginners should master cheeks and jaw first, then decide if the nose needs anything (most don’t).
5. Highlight: tops of cheekbones, bridge of nose, brow bone — then blend the boundary between contour and highlight so no line exists.
The daylight test: check your work in natural daylight, not just bathroom lighting. Bathroom lighting is flattering and dishonest; daylight reveals every unblended edge. If it looks good in daylight, it’s good.
Is It Worth It? The Honest Cost-Benefit
Worth learning if: you enjoy makeup as a creative skill, you photograph frequently (contour photographs better than it looks in person — cameras flatten faces, and contour restores dimension), or you like the sculpted aesthetic. The skill transfers: understanding light and shadow improves all makeup application.
Skippable if: you prefer a natural look (well-placed blush does 70% of what contour does for everyday faces — blush adds dimension and color with half the effort), you’re low-maintenance, or the technique frustrates you. There is no moral or aesthetic obligation to contour. Plenty of professional makeup artists skip it for daytime looks.
The budget angle: you don’t need a $60 palette. One cool-toned cream stick ($8–$15 from the drugstore) plus the damp sponge you already own is the complete starter kit. The skill is in the blending, not the product — a $10 stick blended well beats a $60 palette applied badly.
Contouring is fundamentally about face shape — the same balance principles behind picking sunglasses for your face shape (where to add, where to minimize). And shade selection depends on your coloring — colors for warm skin tones helps you choose contour and blush shades that harmonize rather than clash.
Beginner Mistakes (All Fixable)
Too dark, too warm: contour should be 1–2 shades deeper than skin, cool/neutral undertone. Darker isn’t more sculpted — it’s muddier.
Wrong placement: contour on the cheekbone instead of under it; jawline stripes not blended into the neck; forehead contour on a forehead that didn’t need it. When in doubt, use less and place higher.
Skipping blending: the #1 visible error. Blend twice as long as you think necessary, in natural light.
Contouring every feature: cheeks + jaw is a complete look for most faces. Full-face contour (temples, forehead, nose, chin, jaw, cheeks) is stage makeup — impressive in photos, heavy in person.
Ignoring the rest of the face: strong contour with no blush looks hollow and unwell; contour needs blush (color) and highlight (light) to read as dimension rather than shadow. The trio works together.
Conclusion
Is understanding contouring basics actually worth it for a beginner? If you enjoy makeup — yes, it’s a learnable skill (two weeks of practice), it costs under $15 to start, and understanding light-and-shadow improves all your makeup. If you’re low-maintenance or prefer natural looks — no, and that’s a complete answer; blush does most of the job with a fraction of the effort. Either way, the principles are simple: dark recedes, light advances, cool-toned taupe (not orange bronzer), blend in daylight, and less is more. Master the cheek hollow and the jawline, and you know 80% of what there is to know. The FDA’s cosmetics safety resources and the AAD’s skin care basics cover the safety side of everything you apply.
Frequently Asked Questions
What’s the difference between contour and bronzer?
Contour (cool/neutral taupe, matte) creates shadow illusion to sculpt; bronzer (warm, often shimmery) adds warmth and color like a tan. They’re different products for different jobs — using warm bronzer as contour is the most common beginner mistake, reading as “dirty” rather than “sculpted.”
Should beginners use cream or powder contour?
Cream — it’s more blendable and forgiving, which matters more than precision when learning. Mistakes blend away. Powder sets fast and shows harsh lines. Start with an affordable cream stick in a cool taupe shade.
How long does it take to learn contouring?
The basics (cheek hollows, jawline, blending) click within about two weeks of regular practice. Refinement — nose contour, adapting to your specific face — develops over months. It’s a motor skill; daily 5-minute practice beats occasional long sessions.
Do I need to contour every day?
No. Contouring is optional — blush alone provides dimension for everyday looks with far less effort. Many people contour only for photos, events, or evenings. There’s no requirement to sculpt daily; it’s a tool, not an obligation.
What shade of contour should I buy?
One to two shades deeper than your natural skin tone, in a cool or neutral undertone (taupe, cool brown) — never orange. Test on your jawline in natural daylight. Drugstore cream sticks ($8–$15) are perfectly adequate for learning.
Leave a Reply