
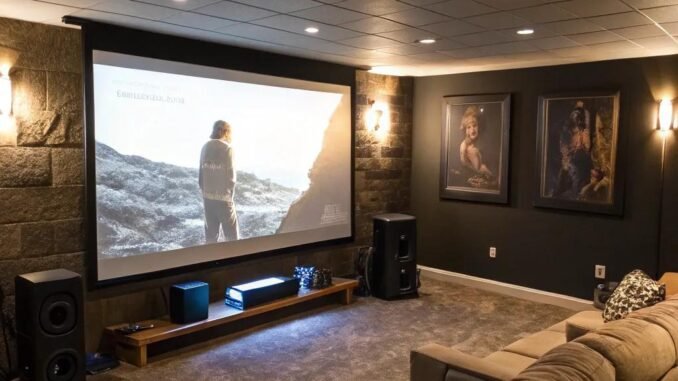
You don’t need a dedicated basement cinema with stadium seating to get the home-theater feeling. If you’re asking how can I make my living room feel like a home theater, the truth is that three upgrades — sound, light control, and seating — deliver 90% of the magic for a fraction of a full build-out.
I transformed my ordinary living room over a few weekends for under $500, and movie nights genuinely feel like an event now. Here’s the priority order, because where you spend first matters enormously.
How can I make my living room feel like a home theater: The Short Answer
Make your living room feel like a home theater by: upgrading sound first (a $200–300 soundbar with subwoofer beats any TV speakers), controlling light (blackout curtains, ~$40, plus bias lighting behind the TV, ~$20), arranging dedicated viewing seating (recliners or a proper couch layout facing the screen), mounting or positioning the TV at eye level from your seat, and adding theater touches — a popcorn station, dimmable warm lighting, and acoustic soft furnishings (rugs, curtains) that improve sound.
Why This Matters More Than You Think
Cinema immersion is mostly about eliminating distractions and engaging senses: darkness removes visual competition, good audio creates the enveloping sound field, and comfortable seating lets you forget your body for two hours. RTINGS’ TV calibration guides Sound is the highest-leverage upgrade because our brains forgive mediocre visuals far more readily than bad audio — dialogue you strain to hear breaks immersion instantly, while a decent 4K TV is already ‘good enough’ for most viewers. Light control is second because even the best TV looks washed out fighting window glare.
6 Tips That Actually Work
Upgrade the sound first — it’s not close
A soundbar with a wireless subwoofer (Vizio M-Series ~$250, Sonos Beam ~$450) transforms the experience more than any TV upgrade. Dialogue becomes clear, action rumbles, and the room fills with sound. Place the soundbar centered under the TV, the subwoofer in a corner. If budget allows, add rear satellite speakers later — but the bar + sub alone is 80% of the win.
Control the light like a cinema
Blackout curtains ($30–50 per panel) are the best-value theater upgrade — daytime viewing without glare changes everything. Then add bias lighting: a $15–25 LED strip behind the TV reduces eye strain and makes the picture look richer (it’s why the image seems to float). Smart bulbs ($10–15 each) let you dim to warm 10% brightness with a voice command: ‘movie time.’
Fix your seating geometry
Theater rule of thumb: sit 1.5–2.5x the screen’s diagonal away (a 65″ TV wants 8–13 feet). Center the main seats on the screen, TV at eye level when seated — mounting too high is the classic mistake that causes neck ache. If new furniture isn’t in the cards, rearrange what you have: angle chairs inward, add floor cushions for overflow, and claim the good blankets.
Calibrate the picture (free, 10 minutes)
Switch your TV from Vivid/Dynamic mode to Movie/Cinema/Filmmaker mode — manufacturers ship TVs oversaturated for showroom floors, not living rooms. Turn off motion smoothing (the ‘soap opera effect’) for films. These two changes cost nothing and make everything look dramatically more cinematic. RTINGS.com has free per-model calibration settings.
Add the theater rituals
A dedicated popcorn station (maker + bowls + seasonings on a bar cart, ~$60 total), a mini-fridge or drink station nearby, dimmable sconces or fairy lights for pre-show ambiance, and a rug plus curtains to tame echoey rooms. These touches signal ‘event’ to your brain — the ritual is half the immersion.
Consider a projector for the wow factor
If you have light control and a blank wall (or $100 screen), a 1080p projector ($300–500, like the BenQ TH585) gives you a 100+ inch image that no TV matches for sheer cinema scale. It’s the closest to a real theater — with the tradeoff of needing darkness and a little setup fiddling.
My Favorite Tools and Brands
For independent reviews and current availability before you spend any money, PCMag’s home theater buying guides is a solid reference.
- Vizio M-Series soundbar + sub — ~$250 — The price-to-performance king of home audio upgrades.
- Blackout curtains — ~$40/panel — Glare-free viewing any time of day.
- LED bias lighting strip — ~$20 — Behind-TV glow that reduces eye strain and boosts perceived contrast.
- Popcorn maker + supplies — ~$40 — Theater smell is theater feeling.
Common Mistakes to Avoid
- Upgrading the TV before the sound. A great TV with tinny speakers is half a theater. Sound first, always.
- Mounting the TV too high. Above the fireplace looks nice in photos and feels terrible after 30 minutes. Eye level from your seat.
- Leaving motion smoothing on. It makes films look like daytime soap operas. Turn it off for movies — Filmmaker Mode does this automatically.
- Ignoring room echo. Bare hardwood rooms sound harsh. A rug, curtains, and soft furniture dramatically improve audio quality for free.
Frequently Asked Questions
How much does a home theater setup cost?
A transformative living-room setup runs $300–600: soundbar ($250), blackout curtains ($80), bias lighting ($20), seating tweaks ($0–150). A dedicated room with projector and surround sound runs $1,500–5,000+. Start with sound and light — the returns diminish fast after that.
Is a projector or TV better for home theater?
Projectors win on size-per-dollar and cinema feel but need darkness; TVs win on brightness, convenience, and daytime use. For a multi-use living room, a 65–75″ TV is more practical. For a dedicated dark room, projectors are magical.
Do I need surround sound?
A good soundbar with subwoofer satisfies most people. True 5.1 surround adds directional effects (helicopters overhead, rain around you) that enthusiasts love — add rear speakers to a compatible soundbar system when you’re ready, rather than all at once.
The $100 Starter Upgrades
If $500 feels steep, here’s the priority order for a $100 transformation: blackout curtains for the main viewing window ($40), an LED bias light strip behind the TV ($20), and switching the TV to Filmmaker/Movie mode (free) plus turning off motion smoothing (free). That’s $60 and 30 minutes for a dramatically more cinematic room. Add the $30 Bluetooth speaker next month. The expensive stuff — soundbars, projectors — can wait until you’re hooked.
Sound first, darkness second, seating third — then the rituals that make it feel like an event. Under $500 and a few weekends gets you 90% of a dedicated theater. For more ways to upgrade your downtime, see animated movies for adults to enjoy, find open mic nights near me, and board games for a family game night.
Leave a Reply