
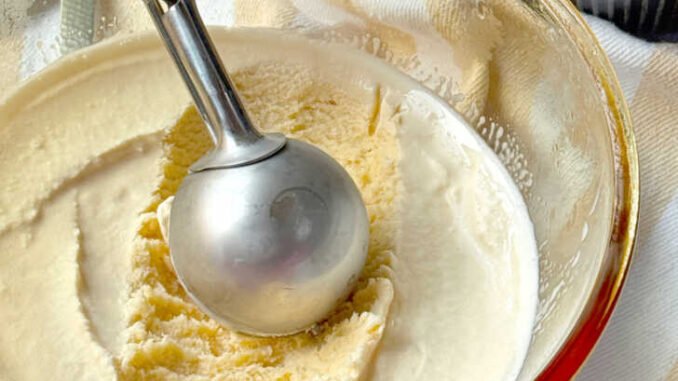
You don’t need a $70 ice cream maker to make ice cream that rivals the pint shop. If you’re asking how can I make homemade ice cream without a machine, the answer is sweetened condensed milk — the ingredient that changed the no-churn game forever, because it keeps ice cream scoopable without churning.
I’ve made no-churn ice cream dozens of times, and the base recipe below takes 15 minutes of actual work. The texture won’t fool a gelato snob, but it’s creamy, rich, and endlessly customizable — and your friends will not believe there’s no machine involved.
How can I make homemade ice cream without a machine: The Short Answer
The easiest no-churn ice cream: whip 2 cups heavy cream to stiff peaks, fold in one 14-oz can of sweetened condensed milk, 1 tablespoon vanilla, and a pinch of salt. Pour into a loaf pan, freeze 6+ hours. The condensed milk’s sugar content keeps it scoopable without churning. Customize with mix-ins: crushed Oreos, peanut butter swirls, fruit compotes, or chocolate chunks. For sorbet-style, blend frozen fruit with a little honey — no dairy needed.
Why This Matters More Than You Think
Ice cream texture comes down to ice crystal size: machines churn constantly to keep crystals tiny. Serious Eats’ no-churn ice cream tests No-churn methods work around this with chemistry instead of mechanics — sweetened condensed milk is about 40% sugar, and sugar lowers the freezing point and interferes with crystal formation, keeping the texture smooth and scoopable straight from the freezer. Whipped cream adds air (overrun) for lightness, replacing what churning would incorporate. It’s food science doing the machine’s job.
5 Tips That Actually Work
Nail the base ratio
2 cups heavy cream whipped to stiff peaks + 1 can (14 oz) sweetened condensed milk + 1 tablespoon vanilla + pinch of salt. Fold gently — you want to keep the air in the whipped cream. This base is your canvas; everything else is decoration. Don’t reduce the condensed milk or it won’t stay scoopable.
Whip to proper stiff peaks
Under-whipped cream gives dense, icy ice cream; over-whipped gives butter. You’re aiming for peaks that stand straight when you lift the beaters, with a smooth (not grainy) look. Chill your bowl and beaters 15 minutes beforehand — cold equipment whips faster and higher.
Layer your mix-ins
Pour a third of the base into a loaf pan, add mix-ins, repeat. Layering distributes chunky additions (cookie pieces, brownie bits, fruit swirls) evenly instead of sinking them all to the bottom. For swirls (fudge, caramel, peanut butter), warm them slightly so they ribbon instead of clump, then drag a knife through once.
Try the frozen-fruit ‘nice cream’ shortcut
Blend 3 cups frozen banana slices or mango chunks with 2–3 tablespoons milk or coconut milk until it looks like soft-serve — about 2 minutes, tamping down as needed. Eat immediately for soft-serve texture or freeze 2 hours for scoopable. It’s not ice cream, but it’s shockingly good and takes 5 minutes.
Freeze in the right vessel
A standard 9×5 loaf pan is ideal — shallow enough to freeze evenly, easy to scoop from. Press plastic wrap directly on the surface before the lid to prevent ice crystals and freezer odors. Freeze at least 6 hours; overnight is better. Let it sit 5–10 minutes on the counter before scooping.
My Favorite Tools and Brands
I only recommend gear I’ve actually used or that’s widely vetted by testing labs — King Arthur Baking’s frozen dessert guides is worth checking before you buy.
- Hand mixer — ~$30 — Whipping 2 cups of cream by hand is a workout; a mixer makes it 3 minutes.
- 9×5 loaf pan — ~$12 — The ideal no-churn freezing and serving vessel.
- Sweetened condensed milk — ~$3/can — Eagle Brand or store brand; the magic ingredient.
- Ice cream scoop with liquid-filled handle — ~$15 — Cuts through no-churn ice cream like butter.
Common Mistakes to Avoid
- Stirring instead of folding. Stirring deflates the whipped cream and you lose the airy texture. Fold gently with a spatula, turning the bowl.
- Adding watery fresh fruit directly. Fresh fruit’s water content forms ice crystals. Cook fruit into a compote first, or use jam/preserves for fruit swirls.
- Skipping the salt and vanilla. They don’t make it salty or vanilla-y — they make everything else taste more like itself. Never skip them.
- Freezing in a deep container. Deep tubs freeze unevenly and are hard to scoop. Shallow loaf pans win every time.
Frequently Asked Questions
How long does no-churn ice cream last?
2–3 weeks in the freezer at peak quality, tightly covered with plastic pressed on the surface. After that it’s still safe but picks up freezer flavors and iciness.
Can I make it dairy-free?
Yes — whip chilled coconut cream (the solid from 2 cans of full-fat coconut milk, ~$4) instead of heavy cream, and use sweetened condensed coconut milk (~$4). The texture is slightly less smooth but genuinely delicious.
Why is my no-churn ice cream icy?
Usually under-whipped cream, too little sugar/fat, or slow freezing. Make sure peaks are stiff, don’t skimp on the condensed milk, and get it into the coldest part of your freezer quickly.
The Flavor Combos Worth Trying
Once you’ve nailed the base, these five variations are elite: (1) crushed Oreos + fudge swirl; (2) peanut butter ribbons + chopped Reese’s cups; (3) fresh strawberry compote + shortbread chunks; (4) cold brew concentrate + chocolate-covered espresso beans; (5) salted caramel + toasted pecans. The formula is always the same — fold chunky mix-ins between layers, ribbon the sauces — but the combinations are endless. My personal champion is brown butter + bourbon + pecans, and I will not be taking questions.
Whipped cream plus sweetened condensed milk is all that stands between you and homemade ice cream — no machine, no churning, 15 minutes of work. Once you’ve got the base down, the flavor possibilities are endless. Serve it after make creamy mashed potatoes without lumps, alongside freezer meals to prepare before a new baby arrives, or as the grand finale to make fluffy pancakes from scratch every time.
Leave a Reply