
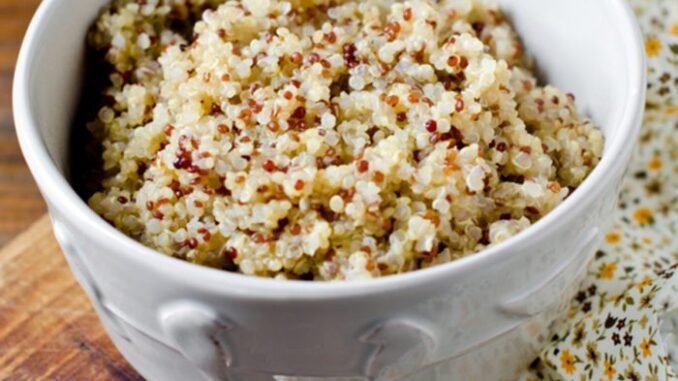
Mushy quinoa is the reason so many people think they hate quinoa. That sad, porridge-like pile next to the chicken? Yeah, I’ve served that too. If you’re asking how do I cook quinoa so it isn’t mushy, the fix is a ratio adjustment and one step most recipes skip: letting it steam, untouched, off the heat.
Perfect quinoa is fluffy, with distinct little grains that pop gently between your teeth and a tiny white tail (the germ) curling out. It takes 20 minutes, one pot, and a little restraint. Here’s the method that converted this former quinoa skeptic.
How do I cook quinoa so it isn’t mushy: The Short Answer
For fluffy, non-mushy quinoa: rinse 1 cup quinoa in a fine-mesh strainer, combine with 1.5 cups water or broth and 1/2 teaspoon salt in a saucepan, bring to a boil, then reduce to low, cover, and simmer 15 minutes. Remove from heat and let stand covered for 5–10 minutes — this steaming step is crucial — then fluff with a fork. The 1:1.5 ratio (not 1:2) and the rest period are what prevent mushiness.
Why This Matters More Than You Think
Quinoa turns mushy for two reasons: too much water and impatience. Most package directions call for a 1:2 quinoa-to-water ratio, which is simply too much liquid — it overcooks before the water absorbs. Healthline’s whole-grain nutrition guides The resting step matters because carryover steam finishes cooking the grains gently and lets surface moisture redistribute; fluffing too early releases steam unevenly and breaks the grains. Quinoa’s outer coating (saponin) also tastes bitter and soapy if you skip the rinse — that’s a separate but equally common complaint.
5 Tips That Actually Work
Rinse it — always
Quinoa’s natural saponin coating tastes bitter and soapy. Rinse in a fine-mesh strainer under cold water for 30 seconds, swishing with your hand. Some brands sell ‘pre-rinsed’ quinoa, but a quick rinse costs nothing and guarantees no bitterness.
Use the 1:1.5 ratio
Forget the package’s 1:2 ratio — it’s the number-one cause of mush. One cup quinoa to 1.5 cups liquid, every time. For extra flavor, use chicken or vegetable broth instead of water, and add the salt to the liquid so it seasons the grains from the inside.
Toast before boiling
After rinsing and draining, toast the damp quinoa in the dry saucepan over medium heat for 2–3 minutes, stirring, until it smells nutty. This drives off surface moisture and adds a toasty depth that makes quinoa taste intentional instead of bland. Then add your liquid.
Don’t peek, don’t stir
Once it simmers, lid on, heat to low, walk away for 15 minutes. Lifting the lid releases steam and drops the temperature; stirring breaks grains and releases starch. Quinoa needs the same undisturbed steaming you’d give rice.
Rest it, then fluff with a fork
Off the heat, lid still on, 5–10 minutes of rest. Then fluff gently with a fork — never a spoon, which mashes. You’ll see distinct grains with their little curled germs. If there’s a tablespoon of liquid left, just let it sit another few minutes; it’ll absorb.
My Favorite Tools and Brands
I only recommend gear I’ve actually used or that’s widely vetted by testing labs — Academy of Nutrition and Dietetics is worth checking before you buy.
- Fine-mesh strainer — ~$10 — Essential for rinsing without losing half your quinoa down the drain.
- Heavy-bottomed saucepan with lid — ~$30 — Even heat prevents scorching on the bottom layer.
- Vegetable or chicken broth — ~$3 — The easiest flavor upgrade; keep cartons on hand.
- Fork (not spoon) — $0 — The right tool for fluffing without mashing.
Common Mistakes to Avoid
- Following the 1:2 package ratio. It’s too much water, full stop. 1:1.5 is the fluffy-quinoa ratio.
- Skipping the rest. Fluffing immediately after cooking gives you wet, broken grains. Five minutes of patience, lid on.
- Stirring while it cooks. Every stir releases starch and breaks grains. Lid on, hands off.
- Cooking it plain in water with no salt. Unseasoned quinoa tastes like packing material. Salt the liquid, use broth, or add aromatics like a bay leaf or garlic clove.
Frequently Asked Questions
Is quinoa better than rice?
Nutritionally, quinoa has more protein (8g per cooked cup vs 4–5g for rice) and more fiber, plus it’s a complete protein with all nine essential amino acids. Taste-wise it’s nuttier and fluffier. Both have their place — I use quinoa for bowls and salads, rice for stir-fries.
Can I meal-prep quinoa?
Yes — it’s excellent for meal prep. Cool completely, refrigerate up to 5 days, and reheat with a sprinkle of water. It holds its texture far better than rice, which is why it’s a meal-prep staple.
Why does my quinoa taste bitter?
Saponin, the natural coating. Rinse thoroughly and the bitterness disappears. If pre-rinsed quinoa still tastes off, rinse it anyway — it takes 30 seconds.
Beyond the Side Dish
Once you’ve mastered fluffy quinoa, it becomes a meal-prep building block: batch-cook two cups on Sunday and deploy it all week — Mediterranean bowls with cucumber, tomato, and feta; breakfast porridge with almond milk, berries, and honey (yes, really — it’s great warm); fried ‘rice’ with soy sauce and vegetables; and stuffed bell peppers. A $4 bag of quinoa becomes five different meals, which is the kind of kitchen math I can get behind. For flavor variations, cook the quinoa in coconut milk with a pinch of salt for a tropical base, or toss the finished grains with lemon zest, olive oil, and herbs for an instant side dish. And if you ever do end up with slightly overcooked quinoa, don’t toss it — it makes excellent veggie burger binder and breakfast porridge, where softness is a virtue.
Rinse, toast, 1:1.5 ratio, simmer undisturbed, rest covered, fluff with a fork — that’s fluffy quinoa every single time. Use it as the base for make restaurant-quality guacamole at home, toss it into what is the easiest way to make homemade pizza dough, or pair it with bake moist chocolate cake without it drying out for a complete meal-prep lineup.
Leave a Reply