
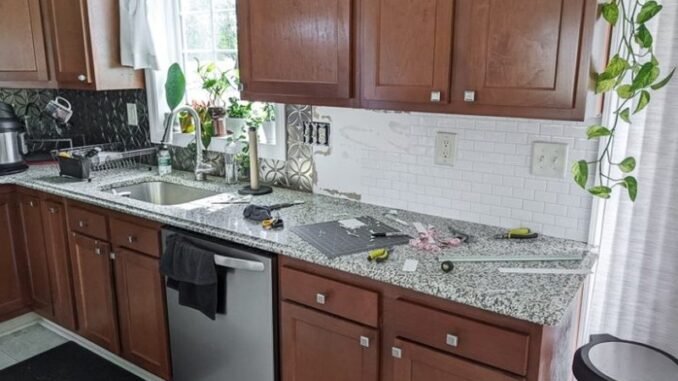
A backsplash is the perfect first tile project: small area, huge visual payoff, and very forgiving. Learning how to install a backsplash in your kitchen yourself takes one weekend, about $150–$300 in materials, and no special skills beyond patience. I’ve tiled three backsplashes, and the first one — done with YouTube and a $60 wet saw — still looks great eight years later. Here’s the complete process.
What You’ll Need
- Tile: measure square footage (height × length of each run), add 15% extra for cuts and breakage. Classic 3×6 subway tile ($2–$5/sq. ft.) is the most forgiving for beginners — its small size hides imperfect cuts.
- Thinset mortar — premixed ($20–$30/gallon, like Mapei Type 1) is perfect for backsplashes; no mixing, no mess. One gallon covers ~25 sq. ft.
- Grout: premixed grout ($18–$25/quart — Mapei Flexcolor CQ) — again, no mixing, consistent color, stain-resistant.
- Tools: notched trowel ($10), 2–3 tile spacers packs ($5), grout float ($12), sponges + buckets ($10), level, pencil, tile cutter or wet saw (rent for $40–$60/day, or buy a basic one for $80–$100).
- Safety: safety glasses, knee pads if doing low areas.
Prep (Saturday Morning)
- Turn off power to outlets on the backsplash wall at the breaker. Remove outlet covers; you’ll tile around the boxes and reinstall box extenders ($2 each) later so outlets sit flush with the new tile surface.
- Clean the wall — degrease with TSP substitute. Thinset won’t bond to greasy drywall.
- Protect counters with rosin paper or a drop cloth.
- Find your center and level line: mark a level horizontal line where the tile meets the counter, and find the visual center of the longest run — start there so cut tiles land symmetrically at both ends (or hidden behind the fridge — pros hide cuts strategically).
Setting Tile (Saturday Afternoon – Sunday)
- Spread thinset on a 2–3 sq. ft. section with the flat side of the trowel, then comb with the notched side at 45°. Don’t spread more than you can tile in 15 minutes — thinset skins over.
- Set tiles with a slight twist, using spacers for consistent joints (1/16″–1/8″ for subway tile). Check level every few tiles — catch drift early, because errors compound across a run.
- Cut tiles as needed: straight cuts on the tile cutter/saw, outlet notches with a wet saw or nippers. Measure twice, cut once — and remember the 15% extra exists for exactly this.
- Let cure 24 hours before grouting. Seriously — grouting early shifts tiles.
Grouting and Finishing (Sunday/Monday)
- Remove spacers. Apply grout with the float at 45°, pressing firmly into joints.
- Wait 15–30 minutes (check the product — premixed grouts vary), then wipe with a damp (not wet) sponge in diagonal strokes. Rinse the sponge constantly.
- Buff the haze off with a dry cloth after another hour. A second haze-buff the next day is normal.
- Caulk (not grout) where tile meets counter and cabinets — 100% silicone in a matching color ($8). Grout cracks at these movement joints; caulk flexes.
- Reinstall outlet covers with box extenders. Turn power back on. Admire.
How Do I Install a Backsplash in My Kitchen Myself? Beginner Tips
- Start behind the stove (the focal point) or at the visual center — your best, most careful work goes where eyes land.
- Subway tile in running bond (offset) pattern is the most forgiving — slight imperfections disappear in the pattern.
- Don’t tile behind the fridge or stove if they’re staying — save tile and time (but tile under where a slide-in range sits if you might change appliances).
- Peel-and-stick option: genuine tile-look panels ($6–$10/sq. ft.) install in hours with no wet saw. Not as durable or valuable as real tile, but a legitimate renter-friendly alternative.
Total: $150–$300 and a weekend for a backsplash that looks professionally installed and lasts decades. The Family Handyman tiling guides are an excellent backup reference for tricky cuts. Take your time with layout, don’t rush the cure, and caulk the edges — those three things separate DIY-looking from pro-looking.
Backsplash Mistakes to Avoid
- Spreading too much thinset at once: thinset skins over in 15 minutes — tiles set on skinned thinset don’t bond and eventually fall off. 2–3 sq. ft. sections, always.
- Grouting before the thinset cures: grouting at hour 6 shifts tiles still settling into the mortar. Wait the full 24 hours — patience is structural.
- Using grout (not caulk) at corners and edges: where tile meets counter, cabinets, or inside corners, the joint moves — grout cracks, 100% silicone caulk ($8) flexes. Caulk all transitions.
- Skipping the layout planning: starting at one end guarantees sliver cuts at the other. Find the visual center, dry-lay the first row, and plan cuts to land symmetrically or hidden (behind the fridge).
DIY Backsplash FAQs
How much does a DIY backsplash cost?
$150–$300 total: tile ($2–$5/sq. ft. — subway tile is the beginner-friendly value pick), premixed thinset ($20–$30), premixed grout ($18–$25), tools ($40–$60 or rent a wet saw $40–$60/day). A pro install runs $800–$1,500 — the DIY savings are enormous.
What’s the easiest tile for beginners?
3×6 subway tile — small size hides imperfect cuts, the running-bond pattern disguises slight misalignment, and it’s cheap ($2–$5/sq. ft.) so mistakes don’t hurt. Mosaic sheets are also forgiving (the mesh holds alignment).
Can I tile over existing tile?
Usually yes if the existing tile is sound, flat, and well-bonded — scuff it with 80-grit, prime with bonding primer, and tile over. Adds ~1/4 inch of depth — check outlet box extenders ($2 each) so outlets sit flush.
How do I cut tile without a wet saw?
Manual tile cutter ($25–$40) handles straight cuts in ceramic — score and snap. For notches and curves (outlets), tile nippers ($12) nibble away bits. Porcelain usually needs the wet saw — rent one ($40–$60/day) rather than fighting it.
Leave a Reply