
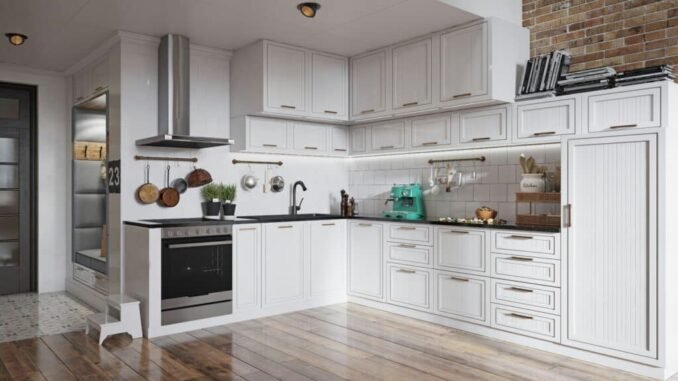
Kitchens punish paint. Grease, steam, splattered tomato sauce, scrubbing — the best paint finish for kitchen walls isn’t about looks, it’s about surviving the room. Pick wrong (flat paint in a kitchen is a classic regret) and you’ll be repainting in two years. Pick right and the walls wipe clean for a decade. I’ve painted four kitchens, and the finish decision matters as much as the color. Here’s the definitive answer.
The Ranking: Best to Worst for Kitchens
- Satin — the winner. A soft sheen (25–35% gloss) that wipes clean easily, resists moisture, and still looks sophisticated. Hides minor wall imperfections reasonably well. This is the default answer for kitchen walls.
- Eggshell — the close second. Slightly less sheen than satin, slightly less scrubbable, slightly better at hiding imperfections. Excellent choice if your walls aren’t perfectly smooth. Many pros use eggshell throughout kitchens and are perfectly happy.
- Semi-gloss — for trim and cabinets, not walls. Extremely durable and wipeable, but on large wall areas it shows every imperfection and can look plasticky. Reserve it for trim, doors, and cabinets.
- Matte/flat — avoid in kitchens. Absorbs grease, stains permanently, can’t be scrubbed without burnishing (shiny spots). Beautiful in bedrooms; a disaster behind a stove.
The verdict: satin for most kitchens, eggshell if your walls are rough. That’s the whole decision for 90% of people.
What Makes Kitchen Paint Different
Beyond sheen, kitchen paint needs:
- Washability/scrubbability: look for paints explicitly rated scrubbable — Benjamin Moore Aura Bath & Spa (matte but scrubbable — the exception to the matte rule), Sherwin-Williams Duration Home, Behr Premium Plus. These survive repeated wiping without losing color.
- Moisture resistance: steam from cooking migrates everywhere. Quality acrylic latex paints handle it; cheap flat paints bubble and peel near stoves.
- Stain blocking: if you’re painting over existing grease stains or a dark color, a stain-blocking primer (Zinsser BIN or KILZ Original) first is non-negotiable — grease bleeds through regular paint.
- Mildew resistance: kitchens near exterior walls can grow mildew; many kitchen/bath paints include mildewcide. Worth specifying.
What Is the Best Paint Finish for Kitchen Walls? Pro Application Tips
- Degrease first: wash walls with TSP substitute ($8) — paint won’t bond to greasy walls, and kitchen walls are always greasier than you think, especially near the stove.
- Two coats minimum — the second coat is what gives you the scrubbable film. One coat of satin is barely better than flat.
- Cut in carefully around cabinets — painter’s tape (FrogTape, $8) gives the crisp lines that make the job look professional.
- Behind the stove: consider semi-gloss on just the wall section behind the range — maximum wipeability where splatter happens.
- Ceilings: flat or matte ceiling paint — no splatter up there, and flat hides imperfections best.
Budget: a typical kitchen needs 2 gallons ($60–$120 for quality paint) plus primer and supplies — under $200 total for a professional-looking result. The Consumer Reports paint tests consistently show that premium lines (Behr Marquee, Benjamin Moore Regal) cover better and scrub cleaner than bargain paints — in a kitchen, the upgrade pays for itself in longevity. Satin on the walls, semi-gloss on the trim, degrease first, two coats — done right once, enjoyed for a decade.
Kitchen Paint Mistakes to Avoid
- Using flat paint: flat absorbs grease permanently and can’t be scrubbed without burnishing. In a kitchen, flat paint is a two-year paint job. Satin or eggshell — always.
- Painting over grease: kitchen walls are greasier than you think, especially near the stove — paint won’t bond to grease and peels within months. Wash with TSP substitute first, every time.
- Skipping the stain-blocking primer: existing grease stains and dark colors bleed through regular paint. Zinsser BIN or KILZ Original under the finish coats — non-negotiable over stains.
- One coat to “save time”: the second coat is what creates the scrubbable film. One coat of satin performs like flat — two coats minimum, always.
Kitchen Paint FAQs
Satin or semi-gloss for kitchen walls?
Satin for walls — wipeable, moisture-resistant, sophisticated (not plasticky). Semi-gloss for trim, doors, and cabinets — maximum durability where hands and splatter hit hardest. Eggshell is the acceptable compromise if your walls are rough.
How do I clean grease off walls before painting?
TSP substitute ($8) in hot water, sponge, rinse — the kitchen degreasing standard. For heavy buildup near the stove, two passes. The wall should feel squeaky, not slick, before priming.
What paint is best behind the stove?
Semi-gloss on the wall section behind the range — maximum wipeability where splatter happens. Or tile that section as a mini-backsplash ($30–$60 in peel-and-stick) for the ultimate splatter defense.
How long does kitchen paint last?
7–10 years with quality satin paint, proper prep, and two coats. Touch up high-wear spots (behind the trash can, near the stove) annually — keep a labeled leftover jar ($0, priceless later).
Painting Kitchen Cabinets vs. Walls: Different Rules
Walls and cabinets live in different worlds — don’t use the same approach. Walls want satin latex (washable, forgiving, 2 coats). Cabinets demand bonding primer + cabinet-specific enamel (Benjamin Moore Advance, Sherwin-Williams Emerald Urethane — $55–$75/gallon), 2–3 thin coats, and 2–3 weeks of cure time before heavy use. Wall paint on cabinets stays soft and chips; cabinet paint on walls is overkill (and harder to touch up). The degreasing standard is also stricter for cabinets — TSP substitute + scuff sand, because hand oils and cooking grease bond to cabinet surfaces far more aggressively than to walls. Two surfaces, two systems — respect the difference and both last a decade; confuse them and neither lasts two years.
Touch-Up Strategy for Kitchen Walls
Keep a labeled leftover jar ($0) of your exact wall paint — brand, line, color, sheen, date written on the lid with a marker. Touch up high-wear spots (behind the trash can, near the stove, around light switches) annually with a small foam roller — 20 minutes keeps the kitchen looking freshly painted for years. Pro tip: paint stores keep your formula on file (by name/phone) — but formulas drift between batches, so the leftover jar (same batch) matches better than a remix. For scuffs that don’t need paint, a magic eraser ($5/box) lifts marks without touching the finish — the first resort before the paint jar.
Leave a Reply