
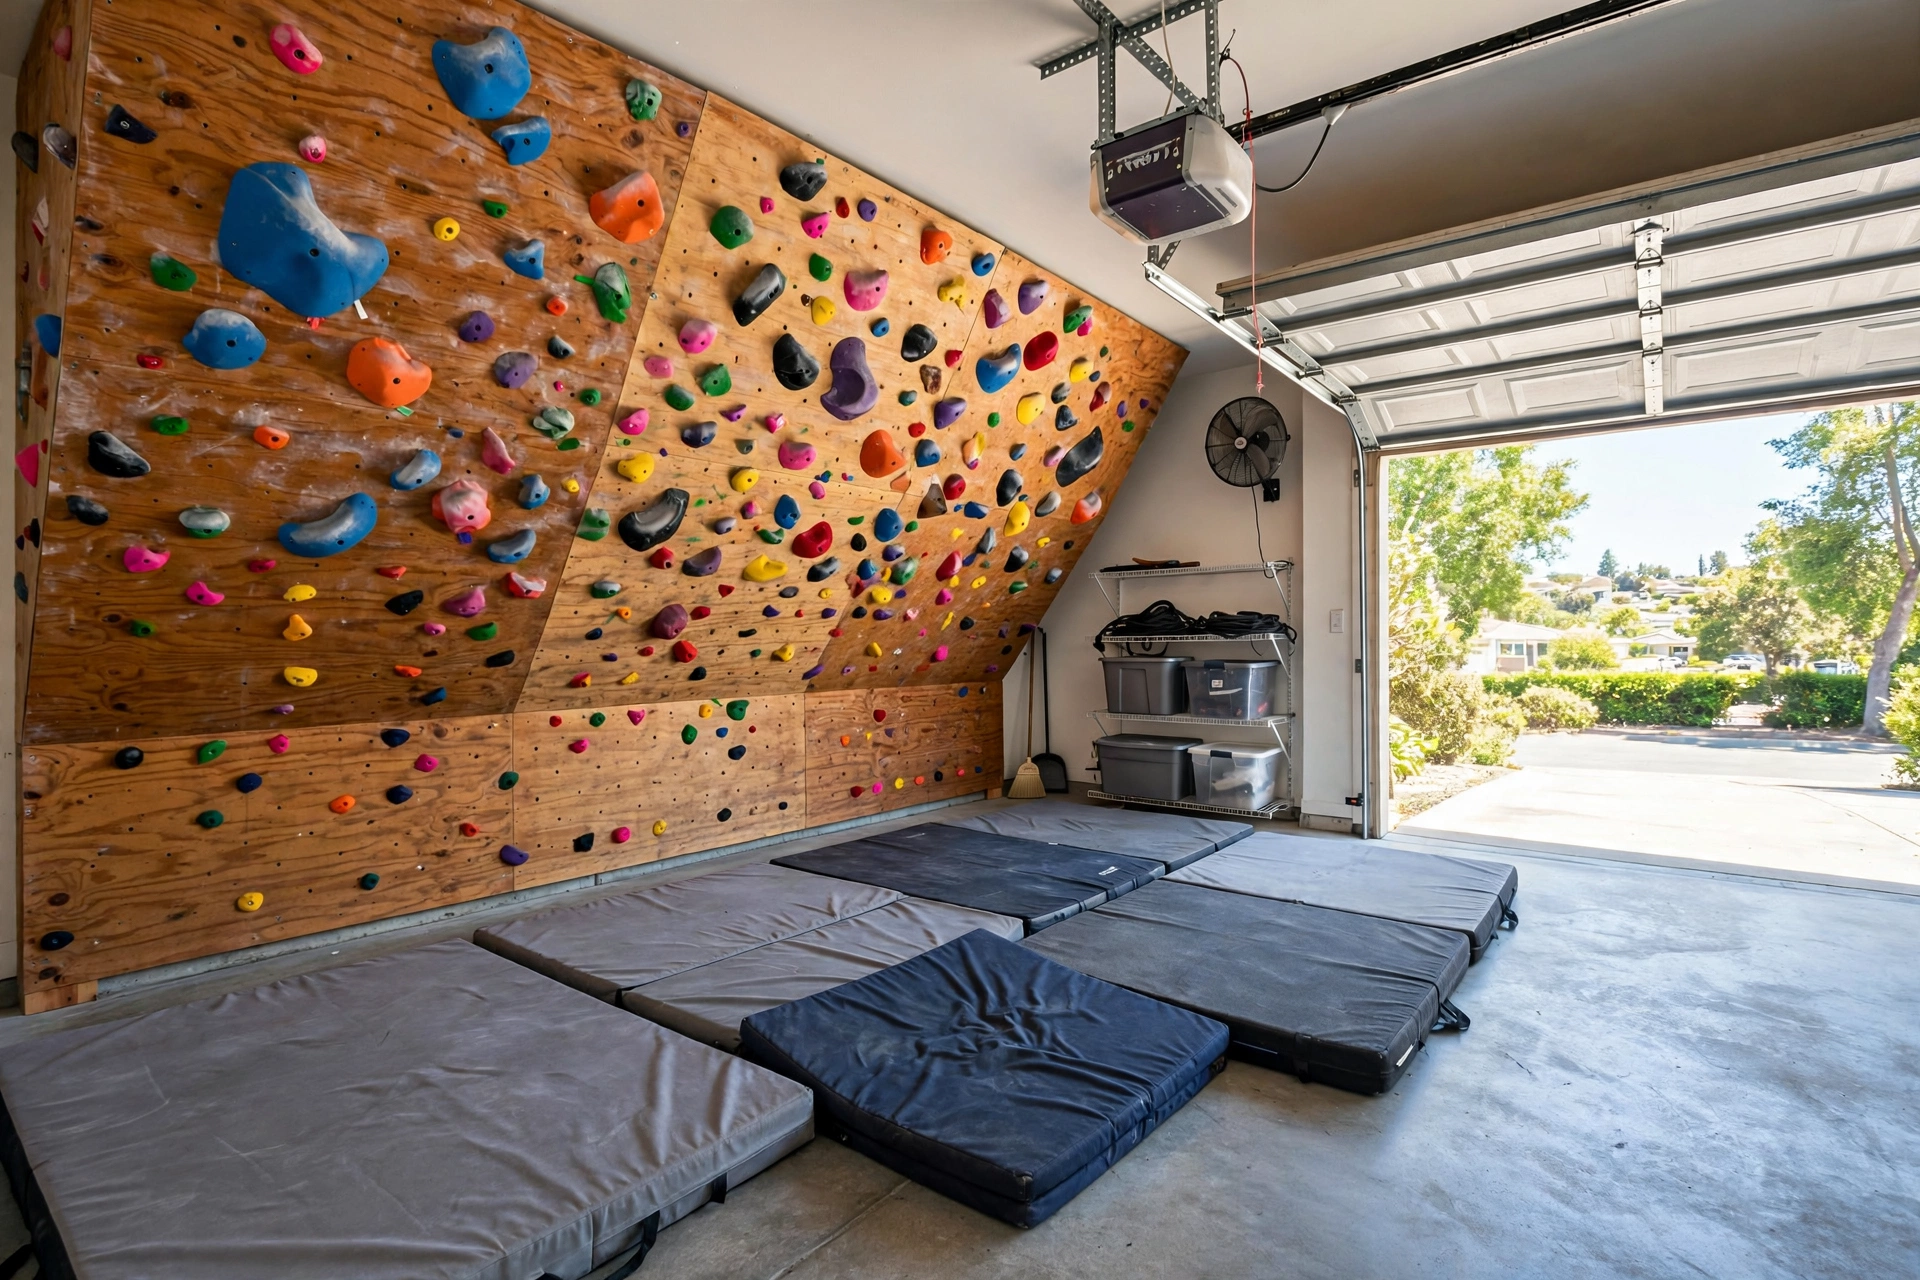
A home climbing wall is one of the best DIY projects a climber can take on. No more driving to the gym for a quick session, no waiting for the wall you want — just walk into your garage and climb. But building one that is safe, sturdy, and actually fun takes real planning. Here is how to build a home climbing wall DIY style, from framing to your first route.
Step 1: Plan Your Space and Angle
Before you buy a single board, answer three questions:
- Where? A garage wall is the classic choice — solid structure, easy to pad the floor. Basements and spare rooms work too, as long as you have at least 8 feet of height. Measure twice.
- How wide? Eight feet wide is the sweet spot for a home wall: wide enough for interesting movement, narrow enough to frame cheaply. Four feet feels cramped fast.
- What angle? A vertical wall (90°) is friendlier for beginners and kids. A 15–30° overhang is harder and more fun once you have some strength. Many builders make the angle adjustable with a hinge at the bottom — more work, but you will never outgrow it.
- how to improve archery accuracy tips
Check what is behind the wall. You need solid studs or masonry to anchor into. Drywall alone will not hold a climber, no matter how good your framing is. And check your ceiling height honestly — you need room for the wall plus a foot or two of clearance above.
Step 2: Gather Materials
For a standard 8 ft × 8 ft wall, you will need roughly:
- 2×4 or 2×6 lumber for framing (about 10–12 studs plus top and bottom plates)
- Two or three sheets of 3/4-inch plywood (exterior grade if the garage gets damp)
- 100–200 climbing T-nuts (the threaded inserts holds bolt into)
- Structural screws (3-inch) and lag bolts for anchoring to the house
- A starter set of 20–30 climbing holds with bolts
- Crash pads, gym mats, or layered foam for the floor
- Drill, stud finder, level, circular saw or jigsaw
Budget around $300–$600 for a basic wall if you buy holds new, less if you find used holds. Do not cheap out on the lumber or the fasteners — this structure holds your body weight plus the force of falls and dynamic moves.
Step 3: Build the Frame
Build the frame like a normal stud wall: a bottom plate, a top plate, and vertical studs every 16 inches. Sixteen-inch spacing matters because it lines up with the house studs you will anchor into and gives the plywood solid backing everywhere.
If your wall is angled, build a simple triangle support: the climbing surface leans back while kickboards and braces transfer the load to the floor and the house wall. Every angled wall needs bracing you trust with your full weight — when in doubt, add another brace. Then anchor the frame into the house studs or masonry with lag bolts, not just screws. Shake the frame hard when you are done. If it moves at all, it is not ready for plywood.
Step 4: Drill the T-Nut Grid
This is the tedious part, and it decides how good your wall feels for years. T-nuts are hammered into the back of the plywood so you can bolt holds anywhere.
- Lay out a grid — 8 inches apart is standard, 6 inches gives you more route-setting freedom.
- Drill 7/16-inch holes at every grid point, straight through the plywood.
- Hammer a T-nut into each hole from the back side, prongs facing the wood. A dab of wood glue helps them stay put.
- Test every single T-nut by threading a bolt in before you mount the plywood. Finding a spinner after the wall is up is miserable.
Yes, it is 100+ holes. Put on a podcast and get through it. A dense, even grid is what makes the wall feel like a real climbing gym instead of a board with random holds.
Step 5: Mount the Plywood and Holds
Screw the plywood to the frame with structural screws every 8–12 inches. Stagger the sheets so seams do not line up, and leave a tiny gap between sheets for expansion if the space gets humid.
Now the fun part: setting holds. Start with big, friendly jugs — you want your first sessions to feel encouraging, not punishing. A few tips:
- Use the correct bolt length. Too short and the hold spins; too long and it pokes through the back.
- Tighten holds firmly but do not crank them — overtightening cracks plastic holds.
- Add a small screw next to spinning-prone holds if they have a set-screw hole.
- Set a few easy circuits (color-code with tape) so you have actual routes to climb, not just a random scattering.
Step 6: Pad the Floor and Make It Safe
Falls happen, even on short walls. Cover the landing zone — which extends a couple of feet out from the wall — with real padding: climbing crash pads, secondhand gym mats, or at minimum several inches of dense foam. A yoga mat on concrete is not padding.
Set house rules from day one: no climbing alone if you are trying hard moves, check every hold for spinning before each session, keep the floor clear of tools and clutter, and keep kids supervised. Inspect the frame and anchors every few months — wood shifts and bolts loosen over time.
How Much Does It Really Cost?
A basic 8×8 wall usually lands between $300 and $600. Lumber and plywood eat about half of that — prices swing with your local market, so call the lumberyard before you budget. A starter set of new climbing holds runs $80-$150 for 20 to 30 pieces; buying used holds from a local gym or marketplace can cut that in half. T-nuts are cheap in bulk (a box of 100 costs less than a pizza), and structural screws and lag bolts add maybe $30. The padding is the wildcard: secondhand gym mats are the best value, while new crash pads cost the most but move with you to outdoor boulders later. Skip the fancy extras at first — textured paint, LED lighting, and adjustable-angle hinges are nice upgrades for version two, not requirements for version one. Whatever you spend, remember you are buying back every future gym day-pass you will not need.
Step 7: Train Smart on Your New Wall
The wall is built, but the real gains come from how you use it. Warm up every session — a few minutes of easy traversing beats jumping straight onto hard moves and tweaking a finger. Speaking of fingers, go easy on tiny crimps for the first months; tendon injuries are the classic home-wall mistake.
Flexibility pays off hugely in climbing — high steps, drop knees, and heel hooks all demand mobile hips. Working on improving your flexibility will unlock moves that pure strength never will. And after a hard evening session, nothing beats deep rest — which starts with choosing a sleeping bag that actually lets you recover on climbing trips.
Maintenance Checklist
- Monthly: check holds for spinning, wipe chalk dust off with a damp cloth.
- Quarterly: inspect frame joints, anchors, and padding for wear.
- Yearly: rotate or replace worn holds, re-tighten all structural bolts.
- Anytime: if the frame creaks in a new way, stop climbing and investigate.
Build it right, respect it, and your garage wall will give you thousands of hours of climbing. There is nothing quite like finishing a workday, walking ten steps, and pulling onto your own wall.
Want more background? See the Climbing wall on Wikipedia, learn about Plywood grades for the surface, and how a T-nut fastener works.
You May Also Like
- How to Improve Flexibility for Dancing — hip mobility drills that make climbing moves easier too.
- How to Choose a Sleeping Bag — recover properly on your outdoor climbing trips.
Leave a Reply