
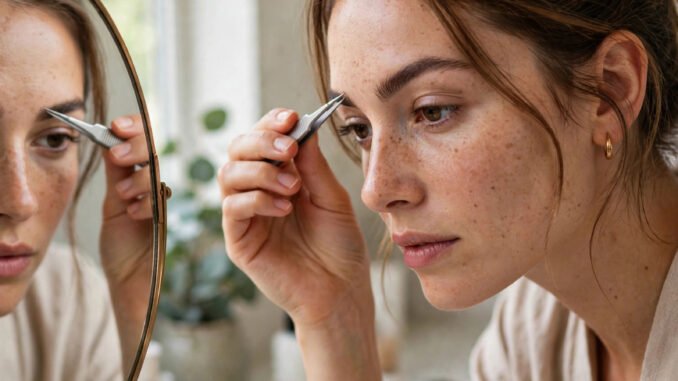
Eyebrows frame the entire face — makeup artists call them the curtains to the eyes’ windows, and they are not wrong. Well-shaped brows can make you look rested, lifted, and polished with zero other makeup; over-plucked or misshapen ones do the opposite. The beauty industry charges $20–$60 per brow shaping session, which adds up to hundreds yearly for maintenance. But shaping your own eyebrows is one of the most learnable beauty skills — it requires a $10 tool kit, a mirror, good light, and the discipline to stop before you go too far.
Before You Touch Them: The Golden Rules
Rule 1: Step away from the mirror. The number one DIY brow disaster is magnifying-mirror myopia — tweezing in 10x magnification, then stepping back to discover half your brow is gone. Use a regular mirror and step back every few tweezes to check symmetry. Rule 2: Less is more, permanently. Over-plucked brows can take months to regrow — and after 40, sometimes never fully. When in doubt, stop. You can always remove more tomorrow. Rule 3: Follow your natural shape. Your bone structure designed your brows; the goal is cleanup and definition, not redesign. Chasing a celebrity’s brow shape on a different face structure ends badly. Rule 4: Good light or nothing. Natural daylight by a window — never overhead bathroom lighting alone, which casts misleading shadows.
Mapping Your Brows (The 3-Point Method)
Professionals map brows with three reference points — do the same with any straight tool (a pencil, a makeup brush handle):
Point 1 — where the brow starts: Hold the tool vertically along the side of your nose. Where it crosses the brow is your start point. Hairs inside this line (toward the nose bridge) can go; the start itself stays. Point 2 — the arch: Angle the tool from the nose’s edge through the outer edge of the iris (looking straight ahead). Where it crosses the brow is your natural arch peak — the highest point, where shaping has the most lifting effect. Point 3 — where the brow ends: Angle from nose edge through the outer corner of the eye. The brow should end here — tails extending past this point drag the face down; tails ending short make eyes look smaller.
Mark the three points lightly with a brow pencil before tweezing. This two-minute mapping prevents 90% of shaping mistakes, because every tweeze now has a reference.
The Technique: Tweezing Without Regret
Tools: Slant-tip tweezers ($8–$12 — the single most important purchase; cheap tweezers slip and break hairs), a spoolie brush ($2–$3), small scissors ($5–$8), and brow pencil or powder close to your hair color ($6–$10). Total kit: under $25, lasting years.
Process: 1. Brush brows upward with the spoolie to reveal their natural shape and spot the strays. 2. Tweeze only the obvious strays first — below the brow line and between the brows — pulling in the direction of hair growth with skin held taut. 3. Step back, check symmetry. 4. For length: brush hairs straight up and trim only the tips extending beyond your mapped shape with small scissors — never trim across the whole brow. 5. Fill sparsities lightly with pencil using hair-like strokes, following growth direction; less product than you think. 6. Set with clear brow gel if you have it (optional).
What not to tweeze: Above the brow (this is where shape lives — mistakes here are the most visible), the arch’s top edge (lowers the arch and ages the eye), and during PMS or after caffeine (pain sensitivity peaks — morning sessions hurt less). The American Academy of Dermatology advises patch-testing any brow tinting or chemical product before use near the eyes. The FDA’s cosmetics page covers safe use of brow products including tinting dyes — read it before trying at-home tinting, which carries real allergy risks.
Shaping for Your Face (Guidelines, Not Rules)
Round faces: A slightly higher arch adds definition and length. Long faces: Flatter, straighter brows visually shorten the face. Heart-shaped: Soft, rounded arches balance a wider forehead. Square faces: Stronger, defined brows complement angular features; avoid overly thin shapes. Oval faces: The versatile face — maintain the natural shape with cleanup. These are tendencies, not mandates — your natural brow already approximates what suits you, which is why Rule 3 (follow the natural shape) overrides all of them. For the rest of your look, our guide to sunscreen for sensitive skin protects the canvas, and building a capsule wardrobe on a budget extends the polished-minimalist philosophy beyond the face.
Maintenance and Growing Out Mistakes
Maintenance tweezing every 1–2 weeks (5 minutes, strays only) preserves the shape indefinitely — the skill compounds. If you over-pluck: stop all tweezing immediately, fill with pencil or powder daily, apply castor or argan oil nightly (evidence is anecdotal but harmless), and wait 6–12 weeks for regrowth. Resist the urge to “even them out” by matching the damage on the other side — the classic spiral. For significant reshaping needs (very sparse brows, major asymmetry), one professional session ($25–$50) to establish the shape, followed by DIY maintenance, is the smart hybrid — you pay once for the map, then maintain free.
Trends cycle — the thin 90s brow, the bold 2010s brow, the laminated 2020s brow — but your natural shape is the only trend that never dates. When in doubt, choose the version of your brows that looks like you on your best-rested day.
Brow Products: What Is Worth Buying
Beyond the shaping kit, the product shelf is deep — here is what earns its place: Tinted brow gel ($8–$12): The highest-ROI brow product — adds color, fullness, and hold in 30 seconds; ideal for daily polish after shaping. Brow pencil ($6–$10): Best for precise filling of sparse spots; choose a shade matching your brow hair (not your head hair) and use hair-like strokes. Brow powder ($8–$12): Softer, more natural finish than pencil — better for full but shapeless brows. Clear gel ($6–$8): Sets unruly brows without color; the minimalist’s choice. Skip: Brow stamp kits (one-shape-fits-none), expensive “brow growth” serums with thin evidence at high prices, and at-home tinting kits unless you have done a patch test and accept the allergy risk — salon tinting ($15–$25, lasting 3–4 weeks) is the safer middle ground. Whatever you buy, remember the hierarchy: shape first (free, permanent-ish), product second (daily, removable). Great shape with no product beats great product on bad shape every time.
Conclusion
Shaping your eyebrows without wasting money means: map the three points before touching tweezers, use a regular mirror in daylight and step back constantly, tweeze only obvious strays below and between (never above), trim length sparingly, fill lightly, and maintain every couple of weeks. A $25 kit replaces $300+/year in salon visits. The skill is restraint, not artistry — and restraint, practiced monthly, is free.
Frequently Asked Questions
How do I shape my eyebrows at home for beginners?
Map three points (brow start, arch, end) with a pencil held against your nose, then tweeze only obvious strays below and between the brows, checking symmetry in a regular mirror every few tweezes. Stop early — you can always remove more later.
What tools do I need to shape eyebrows?
Slant-tip tweezers ($8–$12), a spoolie brush ($2–$3), small scissors ($5–$8), and a brow pencil or powder matching your hair color ($6–$10). Under $25 total, lasting years.
How often should I tweeze my eyebrows?
Maintenance every 1–2 weeks (5 minutes for strays only). Full reshaping should be rare — frequent reshaping leads to over-thinning.
How long do over-plucked eyebrows take to grow back?
Typically 6–12 weeks. Stop all tweezing, fill daily with pencil or powder, and resist evening out the other side. After 40, regrowth can be slower or incomplete — another reason for restraint.
Should I tweeze above my eyebrows?
Generally no — the brow’s upper edge defines its shape, and mistakes there are the most visible. Clean up obvious strays only, and consider professional help for significant upper-edge reshaping.
Leave a Reply