
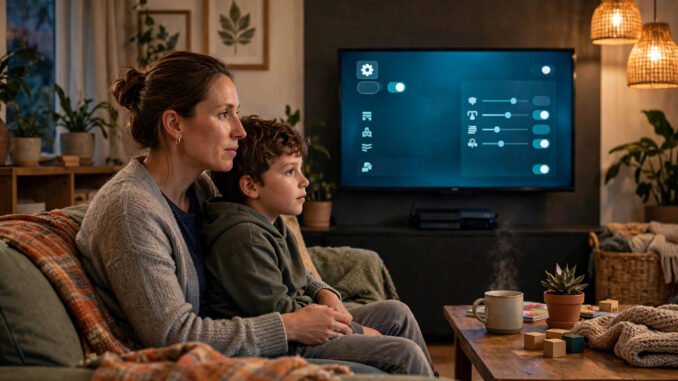
The controls that actually change how a child uses a game console are already sitting inside the machine in your living room. You do not need a subscription, a separate app purchase, or a piece of extra hardware. On a PlayStation 5, an Xbox Series X or S, and a Nintendo Switch, the full set costs $0, and most families can finish the setup in about half an hour per system.
That surprises a lot of parents, because the store pages and ads push paid family apps and monitoring services first. Those paid tools exist, but they sit on top of what the console already does. It helps to understand how parental control tools work at the system level: the console itself can limit which games run, when the machine can be used, what can be bought, and who your child can talk to while playing. When the limit lives in the console, it applies every time the child account signs in, not just when a parent remembers to open an app.
The thirty-second version before you start
Every platform in these steps is built in and free. The console tools are free, and the companion phone apps from Sony, Microsoft, and Nintendo are free as well. What you are really setting, on each system, comes down to five things: an age limit for games, a spending limit with purchase approval, a play-time schedule, limits on chat and communication, and a parent PIN that keeps the settings locked.
One honest note before the steps: menu names may vary slightly with system updates. Sony, Microsoft, and Nintendo rename a label or move a screen from time to time. If a label on your screen is worded a little differently from the words here, look for the closest match in the family or parental controls area and keep going. The order of the choices stays much the same even when a name shifts.
Step 1: Set up the PlayStation 5
Start on the PS5 itself. Open Settings, then go to Family and Parental Controls, and then Family Management. Add your child as a family member with their own account and their real date of birth. The birth date matters because the system uses it as a starting point for age-based limits, and changing it later is harder than entering it correctly the first time.
Next, set the game age level for that child account. Pick the highest rating you are comfortable with, and the console will block games above that level. A blocked game does not just hide in the store. It will not launch from a disc or a download either, which is the part parents actually want.
Then set the monthly spending limit. Set it to $0 to start. A $0 limit does not mean your child can never get a game. It means every purchase needs you, so a tap on a shiny skin or a season pass turns into a request instead of a charge. You can raise the limit later for an older child who has earned more freedom. Starting at zero and loosening on purpose is far easier than starting loose and trying to claw money back.
After spending, restrict communication and user-generated content. For younger children, block voice and text chat with strangers and limit the ability to view or share content made by other players. For older children, you may allow chat with friends while still blocking contact from people they do not know. The right line depends on age, but the setting should be a choice you made, not a default you never looked at.
Set play-time limits as the last PS5 piece. You can set how long the child account can play and which hours are allowed. The console can warn the player as the end approaches, which helps more than a sudden shutoff in the middle of a match. A warning gives a child time to finish a level and save, and it gives you fewer arguments at dinner.
Finish by installing the free PlayStation App on your phone and signing in with your parent account. The app lets you approve requests and adjust settings without turning on the TV or taking the controller away mid-game. Remote approval sounds like a small convenience. In daily life, it is the reason the system keeps working, because a request you can answer from the kitchen is a request your child will actually send instead of working around.
Step 2: Set up the Xbox Series X or S
Xbox starts away from the console. Create a child Microsoft account for your child, then add that account to your Microsoft family group under your own account. Do not skip the family group step. Content filters, screen time, and purchase approval all flow through that group, and an account left outside it will not take the limits the way you expect.
Download the free Xbox Family Settings app on your phone and sign in as the parent organizer. From the app, set content filters by age so games, apps, and media above the level you pick are blocked for the child account. As with the PS5, match the filter to the child in front of you, not to the oldest game they are begging for this week.
Set a screen-time schedule for each day rather than one flat rule for the whole week. School nights and weekends rarely look the same in a real house. The app lets you set allowed hours and a daily total, with bedtime cut-offs that wind play down at night. A schedule the family helped choose holds up better than a limit that appears out of nowhere on a Friday.
Turn on purchase approval, often shown as Ask a parent, for every buy. With approval on, the child picks what they want, you get the request, and nothing is charged until you say yes. Turn it on the first day, before the account has a payment method attached and before a free game starts offering paid extras.
Step 3: Set up the Nintendo Switch
The Switch works best through its phone app. Install the free Nintendo Switch Parental Controls app on your phone, create or sign in with your parent Nintendo Account, and pair the app with the console using the registration steps the app shows you. Pairing links the two, so limits you set on your phone apply to play on the Switch, including handheld play away from the TV.
Once paired, set the restriction level. Nintendo offers presets aimed at teen, young child, and child, and you can also build a custom level. Presets are a good starting point for a first setup because they group related limits together. Custom control is better once you know which single thing you want to change, such as allowing a specific game while keeping the rest of the level firm.
Set a daily play-time limit and a bedtime alarm in the app. The play-time limit tracks how long the console is used that day, and the bedtime alarm tells the player it is time to stop. Nintendo also offers a stronger option that suspends play when the limit is reached. Many families start with the alarm and conversation, then use suspension only if the softer step keeps failing.
Restrict purchases in the Nintendo eShop through the child’s Nintendo Account settings. For children under 13, use a supervised account under your parent account, which keeps purchasing and account control with you. Older children still benefit from purchase limits and approval habits, because the eShop makes buying fast by design and fast buying is exactly what a child should not have.
Because the Switch runs through your phone, finish the pair: apply the same approach when setting up parental controls on your child’s phone, so console time and phone time follow one set of house rules.
Step 4: Lock in the five settings that matter most
Whichever consoles your family owns, come back to the same five settings and confirm each one. First, the age-rating cap. It decides which games can run at all, and it rests on video game content rating systems worldwide, which rate games by age and list content such as violence or language beside the age mark. Set the cap for the child who will use the account, and remember that a rating is a guide for your judgment, not a replacement for it.
Second, spending at $0 with purchase approval on. This one setting prevents the most expensive surprise in family gaming, the quiet string of small charges that only shows up on a card statement. Third, a play-time and sleep schedule that matches school nights and weekends in your house. Fourth, communication and chat limits that fit your child’s age, with stranger contact blocked for younger players. Fifth, a PIN the kids do not know, set on your parent account and on the settings themselves, so limits cannot be edited from the couch in thirty seconds.
Beyond the settings: make the rules hold
Controls work best when they are agreed out loud. Tell your child what you set, why you set it, and what would earn more freedom later. A child who knows that good habits this term lead to a later bedtime limit next term has something to work toward. A child who only finds a locked screen has something to work around.
Plan to loosen the limits as kids grow. Raise the age level when the child is ready, not just when a birthday passes. Lift the spending limit in small steps for a teen who budgets well. Extend weekend play time while keeping the school-night rule firm. Graduated freedom teaches the skill the controls were standing in for, which is judgment about time, money, and contact with strangers.
Look at the play reports together now and then. Ask what a new game is actually like, who they play with, and what they enjoy about it. You will learn more from five curious minutes than from a week of silent monitoring, and your child is more likely to come to you when something online feels wrong if talking about games is already normal in your house.
Finally, protect your own account. Keep your adult profile PIN-protected and do not leave it signed in as the household default. Most control failures are not clever hacks. They are a child picking up a controller on a parent profile where nothing is limited at all. Half an hour of setup, the five settings checked, and your own account locked: that is the whole job, and it costs nothing but the time.
Leave a Reply