
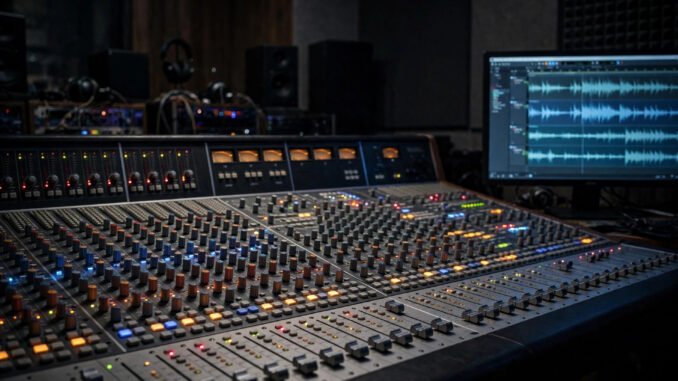
Mixing looks forbidding from the outside. A screen full of knobs, sliders, meters, and plugin windows suggests a craft with a hundred separate skills. Sit with a few finished records and pull them apart, though, and a simpler pattern shows through. Nearly everything you hear comes from five tools, used in the right order, with restraint. Levels and placement first. Tone shaping second. Dynamics third. Space fourth. Colour last. Learn what each tool actually does, and the crowded screen turns into a short sequence you can repeat on every song.
What Mixing Is, and What It Is Not
Mixing is the balancing of sounds that already exist. You take the recorded parts of a song, decide how loud each one should be, where each one should sit, and how they should share the frequency range and the space around the listener. A good mix makes the song feel inevitable, as if the vocal could not possibly sit anywhere else. For a fuller picture of where this stage fits in making a record, see audio mixing in recorded music and how it connects recording to release.
Just as useful is the negative definition. Mixing is not repairing a bad recording. A vocal captured in a clattering kitchen, a guitar played out of tune, a drum take with the timing wandering: mixing can soften flaws at the edges, but it cannot rebuild the performance underneath. Mixing is also not simply making things louder. Loudness without balance gives you a bigger mess, not a better record.
Mastering often gets tangled into this conversation, so untangle it early. Mastering is the final polish applied to the finished stereo mix as a whole: gentle overall tone, consistent loudness, and preparation for release. It is usually a separate step, done after mixing ends, and often by different ears. A beginner who tries to master while still mixing fights two jobs at once. Finish the mix first.
Volume and Panning: Where Most of the Result Lives
If you stripped a mix down to faders and pan knobs alone, you would keep most of what makes it work. That is the honest way to frame the old claim you will see repeated everywhere. Faders and placement do most of the work. Everything after this section refines a result that balance has already created, and nothing after this section can rescue a balance that was never built.
The practical method is the static mix. Pull every effect off, set all faders down, and raise the parts one at a time until the song feels right using level alone. Kick and bass form the floor. The lead vocal or main instrument sits on top, clearly in front. Supporting parts tuck underneath at levels that feel almost too quiet in solo and exactly right in context. Pan some elements off centre so the middle stays uncrowded for the parts that matter most.
EQ: Carving Space Instead of Adding Shine
Equalisation adjusts the balance of frequencies inside a single sound. Beginners reach for it as a booster, turning up treble for excitement and bass for weight until every track fights every other track. Experienced mixers do the opposite. They treat EQ mainly as a cutting tool, removing what each sound does not need so the sounds stop colliding.
The first cut is the high-pass filter. Most sources that are not bass instruments carry low rumble they never use: room thumps, handling noise, microphone handling, air conditioning. Rolling that rumble off a vocal, a guitar, or a piano does not thin the part. It clears a lane for the kick and bass to own, and the whole mix gets cleaner in one move.
The second battleground sits in the low mids, roughly between 200 and 500Hz, where guitars, keys, vocals, snare drums, and bass all have body. Each one sounds warm alone. Stacked together, they pile into mud. Small cuts in that region, placed differently on different instruments, open holes that let each part be heard. Complementary cuts finish the job between close neighbours. If the kick drum speaks at one low frequency, trim a little of that same spot from the bass guitar, and trim the bass guitar’s main weight from the kick. Each sound gets a home address instead of a shared bed.
Compression: Holding Dynamics Without Crushing Life
A compressor reduces the gap between the loud and quiet moments of a sound. When a signal crosses a set level, called the threshold, the compressor turns it down by a set proportion, called the ratio. Attack controls how fast that turn-down happens. Release controls how fast the compressor lets go afterwards. Those four controls explain nearly every compressor you will ever meet, and a detailed walk-through of how dynamic range compression works rewards anyone who wants the mechanics in full.
Plain English helps more than numbers at first. A vocal with wide swings in level disappears on quiet words and jumps out on loud ones. Gentle compression narrows those swings so every word sits at a steady distance from the listener. A snare drum with a slow enough attack keeps its crack, because the compressor lets the first instant pass before clamping down on the body that follows.
Start gentle. Ratios around 2:1 to 4:1 cover most beginner needs on vocals and bass. Set the attack to let transients through rather than shaving them off. Then listen for the failure mode, because over-compression is the fastest way to make a mix sound small. Squeeze too hard and the song stops breathing: quiet details get dragged up, loud moments flatten, and everything sits at the same tired level. Compare constantly against the uncompressed version at matched loudness, and stop the moment the sound gets steadier without getting duller.
Reverb and Delay: Building a Room the Song Lives In
Dry sounds feel close. Wet sounds feel far away. That single relationship lets you arrange a song in depth as well as in height and width. The lead vocal stays relatively dry and stands at the front of the stage. Pads, backing vocals, and ambient parts take more space and drift towards the back wall. The listener may never notice the construction, but they feel the stage.
Reverb creates the sense of a shared physical space. Delay creates distinct echoes that can add rhythm as well as depth. Both tools turn muddy fast when every track carries its own different setting. A cleaner approach uses one or two shared spaces for the whole song: one main room that most elements send a little of themselves into, and perhaps one longer, special space for a featured moment. Shared spaces make a collection of recordings, possibly made on different days in different rooms, sound like a single performance.
Set levels for space by feel. Raise the reverb on a vocal until you can clearly hear it, then pull it back until it disappears as an effect and remains only as a sense of place. That edge, just below obvious, is where most good mixes live. Too much space pushes the singer down a hallway. Too little leaves every part floating in a vacuum, disconnected from its neighbours.
Saturation and Effects: Seasoning, Applied Last
Saturation adds harmonic colour, a slight thickness that comes from driving a signal the way older tape machines and analogue circuits once coloured everything passing through them. Choruses widen, flangers sweep, distortion growls. These are real tools with real uses, and they belong at the end of the chain for a reason. Seasoning cannot fix an unbalanced dish, and it ruins a good one when the cook gets enthusiastic.
The beginner trap is reaching for character effects while basic problems remain unsolved. A vocal that is buried needs level, not a widener. A muddy guitar needs a cut, not saturation to make the mud warmer. Work the order honestly: balance, carve, control, place, and only then flavour. Most mixes need surprisingly little seasoning once the first four steps are done well.
Stock plugins deserve a plain word here. The EQ, compressor, reverb, and delay that ship free inside any major DAW are fine. Professionals release records mixed with stock tools, because the tool matters less than the decisions made with it. Buying a prettier compressor before you can hear what compression does is money spent to avoid learning. Learn on what you own.
The Workflow, in Order, and the Honest Learning Curve
Put the five tools together and a working order appears. Prepare and organise first: name tracks clearly, group related parts, and cut obvious silence and noise. Build the static mix with faders and panning. Apply subtractive EQ to clear collisions. Add compression where dynamics genuinely need control. Create space with shared reverb and delay. Automate last, riding levels through the song so choruses lift and verses settle. One sample session might spend a quarter of its time on preparation and the static mix, a similar share on EQ, and the rest divided among compression, space, and automation, but treat those proportions as one illustration of a session, never as a promise about yours.
Reference tracks are the fastest teacher in this entire craft. Load a released song you admire into your session, match its loudness to your mix, and switch between them every few minutes. The comparison is humbling and specific: their vocal sits higher, their low end is tighter, their chorus opens wider. Chasing those gaps teaches your ears faster than any tutorial, because the target is a real record rather than an opinion.
That habit of deep listening grows with the music you feed it. Time spent discovering new music beyond the same popular songs is not a detour from learning to mix; it is how you collect the records you know deeply enough to use as references, across genres with different balances, spaces, and low-end shapes.
Expect an honest timeline. Your first mixes come together within weeks, shaky but complete. Reliably decent mixes, the kind that translate to cars and earbuds without surprises, take months of regular practice. That is not a warning. It is the normal shape of ear training, and every mixer you admire passed through the same slow stretch. Mix often, finish songs even when they disappoint you, compare against references at matched loudness, and let the five tools in order carry the work. The knobs stop being a crowd once you know which five hands do the lifting.
Leave a Reply