
Few gardening heartbreaks sting like tomato blight: one week your plants are lush and loaded with green fruit, the next the lower leaves are spotted, yellowing, and dying from the ground up. In Los Angeles, though, you have a secret advantage — the city’s dry summers are hostile to the worst blight, and the fixes that work are mostly free. Blight control on a tight budget isn’t about buying every fungicide on the shelf; it’s about identification, sanitation, and watering habits that cost nothing. Here’s how to deal with tomato blight in LA without wasting money.
Know Your Enemy: Early Blight vs. Late Blight
“Blight” is two different diseases, and the treatment differs. Early blight (Alternaria solani) — the common one — shows as dark brown spots with concentric rings (like a target) on lower leaves first, progressing upward; leaves yellow around the spots and drop. It’s a soil-splash disease: fungal spores overwinter in soil and debris, and rain or overhead watering splashes them onto lower foliage. Late blight (Phytophthora infestans — the Irish Potato Famine pathogen) is the nightmare: water-soaked spots that turn brown/black almost overnight, white fuzzy growth under leaves in humid conditions, and fruit rot. Here’s the LA good news: late blight needs cool, wet, humid conditions — exactly what LA summers aren’t. Late blight occasionally appears in coastal fog belts or unusually wet years, but early blight is your likely opponent, and it’s manageable. Diagnosis tip: early blight climbs slowly from the bottom; late blight explodes everywhere fast. When in doubt, your county extension’s free plant clinic or the Cornell Vegetable MD Online photo guides confirm it — don’t buy treatments for a disease you haven’t identified.
The Free Fixes (Do These First)
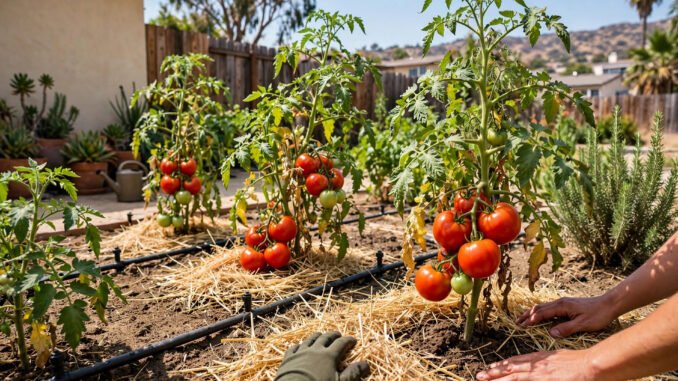
1. Strip the lower leaves. Remove the bottom 8–12 inches of foliage (the “splash zone”) and any spotted leaves — do it on a dry day, disinfect hands/tools between plants, and trash (don’t compost) diseased material. This single habit prevents most early blight spread. 2. Mulch heavily. 3–4 inches of straw, wood chips, or shredded leaves under plants blocks soil splash — the disease’s delivery mechanism. Free arborist wood chips work perfectly. 3. Water at the base, morning only. Drip irrigation or a soaker hose keeps foliage dry; morning watering lets any splashes dry fast. Overhead sprinklers on tomatoes are blight invitations — this costs nothing to change. 4. Space and prune for airflow. Crowded, jungle-like plants stay humid inside; prune suckers moderately and space plants 2–3 feet apart so ocean breezes move through. 5. Rotate. Don’t plant tomatoes (or potatoes, peppers, eggplant — same family) in the same spot yearly; a 3-year rotation starves soil-borne spores. These five practices are the entire foundation of blight management, and they cost zero dollars. Most LA gardeners who do all five never need to buy anything.
One more free tactic experienced growers swear by: morning leaf-shaking. After a rare LA rain or heavy coastal dew, gently shaking plants in the morning knocks water off foliage so leaves dry hours faster — denying fungal spores the leaf-wetness hours they need to germinate. It takes two minutes during your coffee routine and complements everything above. Combine it with reflective silver mulch in whitefly-prone areas (whiteflies stress plants and spread other diseases), and your tomatoes get a genuinely professional-grade protection program assembled entirely from habits and household materials.
When to Spend: The $15 Arsenal
If blight persists despite sanitation, the budget options work. Copper fungicide ($10–$15): the organic-standard protectant — it doesn’t cure infected leaves, it shields healthy ones, so apply at the first sign and reapply after rain per the label. One bottle lasts a home gardener multiple seasons. Baking soda spray (pennies): 1 tablespoon baking soda + 1 teaspoon horticultural oil or mild soap per gallon of water, sprayed weekly — changes leaf pH to discourage fungal growth; modestly effective, essentially free, worth trying before buying copper. Neem oil ($10–$12): mild fungicidal plus insecticidal properties; useful if you’re also fighting aphids or whiteflies. Resistant varieties (same price as any seedling): the smartest money in tomato growing — varieties with VFN resistance codes and blight-tolerant types (Mountain Magic, Defiant, Iron Lady for late blight; many hybrids for early blight) cost no more than susceptible heirlooms at the nursery. In LA’s climate, a resistant variety plus mulching plus basal watering is a near-complete blight strategy. What not to buy: expensive “systemic” fungicides for home gardens (overkill, resistance risks), and any product promising to “cure” blight — infected tissue can’t be uncured, only protected against spread. The Old Farmer’s Almanac’s tomato guides keep a current list of resistant varieties worth browsing before spring planting.
The LA Prevention Calendar
Fall/winter: clean up all tomato debris (the spores overwinter in it), plant a cover crop or mulch beds. Late winter: choose resistant varieties when buying seeds/seedlings; plan rotation. Spring planting: mulch immediately at transplant, install drip or soaker lines, strip lower leaves as plants grow. Early summer: scout weekly — flip leaves, check the bottom third first; remove suspects immediately. Begin copper or baking soda sprays only if you’ve had blight before or spots appear. Peak summer: LA’s heat and dry air are your allies — keep watering at the base, don’t overhead-water “to cool plants down” (it does the opposite of helping). Fall: pull plants at season’s end; never compost diseased foliage in a home pile (it doesn’t get hot enough to kill spores). Follow this calendar and blight becomes a minor chore rather than a crisis — and your tomatoes, roasted, sauced, or sliced onto a sandwich with homemade salad dressing that actually tastes good, will taste like victory. They’re also prime candidates for the best vegetables to roast for meal prep — blight-free tomatoes roast into something transcendent.
Dealing with blight on tomatoes on a tight budget in Los Angeles comes down to this: identify it correctly (probably early blight), strip and mulch and water at the base for free, and keep a $12 bottle of copper fungicide in reserve for bad years. LA’s dry summers do half the work for you — gardeners in humid climates would trade for your problems in a heartbeat. The blight doesn’t care about your budget. Fortunately, beating it doesn’t require one.
Frequently Asked Questions
What does tomato blight look like?
Early blight: dark spots with concentric “target” rings on lower leaves, yellowing, upward progression. Late blight: rapid water-soaked brown/black lesions, white fuzz under leaves in humidity, fruit rot. Early blight is far more common in Los Angeles’s dry climate.
Can blight spread to other plants?
Early blight affects tomatoes, potatoes, peppers, and eggplant (the nightshade family) — rotate all of them. Late blight hits tomatoes and potatoes hardest. It doesn’t affect unrelated vegetables like cucumbers or beans.
Is blighted tomato fruit safe to eat?
Fruit from early-blight-affected plants is safe if the fruit itself is unblemished — the fungus affects foliage. Late blight can rot fruit directly; discard rotted fruit. When in doubt, cut away affected parts generously.
What’s the cheapest effective blight treatment?
Free sanitation (removing lower/spotted leaves, mulching, watering at the base) first. If needed, homemade baking soda spray costs pennies; copper fungicide ($10–$15) is the proven budget buy. Resistant varieties cost no extra at purchase time.
Should I pull the whole plant if it has blight?
Not for early blight — manage it by removing affected foliage and protecting new growth; plants often outgrow it and produce fine. For severe late blight (rapid collapse), remove and trash the plant promptly to protect neighbors.
Leave a Reply