
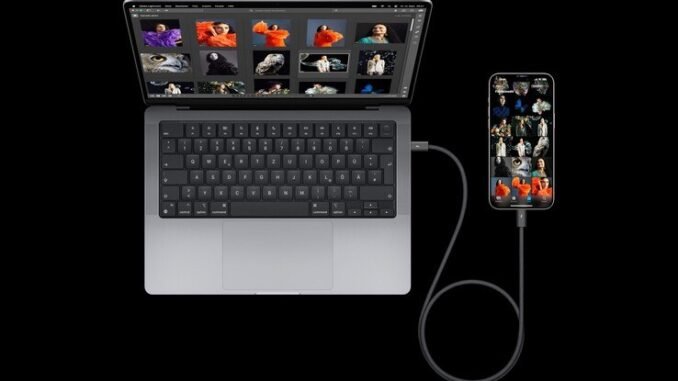
Learning how do I back up my iPhone photos to a computer safely is one of those tasks everyone puts off until the phone is lost, stolen, or dropped in a lake. I learned this the hard way years ago when a dead iPhone took two years of family photos with it. Since then, I keep a rock-solid backup routine, and honestly, the whole thing takes about ten minutes once you know the steps.
The safest approach is a direct USB connection to a computer you trust, because your photos never travel over the internet and never sit on someone else’s server. Below are the exact methods for Mac and Windows, plus how to double-check that your backup actually worked before you delete anything from your phone.
How Do I Back Up My iPhone Photos to a Computer Safely? Start Here
Before you plug anything in, do these two quick things. First, make sure your computer has enough free space. iPhone photo libraries are bigger than people expect, mine is pushing 90GB, so check Settings > General > iPhone Storage > Photos to see your number. Second, use the original Apple cable or a certified MFi cable. Cheap gas-station cables can drop the connection mid-transfer and corrupt files, which is exactly what “safely” is trying to avoid.
Method 1: Back Up to a Mac (macOS Catalina and Later)
- Connect your iPhone to the Mac with a USB cable and enter your passcode.
- Tap Trust when the “Trust This Computer?” alert appears.
- Open the Photos app on your Mac. Your iPhone appears in the sidebar under Devices.
- Click your iPhone, then click Import All New Photos, or select specific photos and click Import Selected.
- Check the box for “Delete items after import” only if you are sure, I recommend leaving it unchecked until you have verified the backup.
For a full-device backup including photos, open Finder, select your iPhone in the sidebar, and click Back Up Now. Tick “Encrypt local backup” so your passwords and health data are included too. An encrypted Finder backup is the single most complete iPhone backup you can make.
Method 2: Back Up to a Windows PC
- Install Apple Devices (the free app from the Microsoft Store) or iTunes if you are on an older setup.
- Connect your iPhone via USB, enter your passcode, and tap Trust.
- Open the Photos app in Windows, go to Import > From a USB device, and follow the prompts.
- Choose a destination folder you will remember, something like D:\Backups\iPhone Photos 2026, not the default buried three folders deep.
Windows users can also open File Explorer, find the iPhone under This PC, and drag the DCIM folder directly. It works, but the Photos app import is more reliable for large libraries because it logs errors instead of silently skipping files.
Method 3: iCloud Photos, Then Download to Your Computer
If you pay for iCloud storage ($0.99/month for 50GB, $2.99 for 200GB), your photos may already be syncing. On your computer, visit iCloud.com, open Photos, and download originals in batches. This is convenient but slower than USB, and I treat it as a second copy rather than my primary backup. Two copies in two places is the real safety standard.
How to Verify Your Backup Actually Worked
This is the step most guides skip, and it is the most important one. After importing:
- Count check: Compare the number of imported photos against the count on your phone (Photos app > Library, scroll to the bottom for the total).
- Spot check: Open a dozen random photos and a few videos on the computer. Play the videos. Make sure they are full resolution, not thumbnails.
- Check Live Photos and videos: These are the files most likely to import incompletely. Open three or four and confirm they play.
- Keep the phone copy until verification is done. Only then should you free up space on the phone.
Safety Rules: What “Safely” Really Means
- Use your own computer. Never back up to a library, hotel, or borrowed computer. Your photos, messages, and location history ride along in a full backup.
- Encrypt the backup. In Finder or Apple Devices, always tick “Encrypt local backup” and store the password in a password manager. An unencrypted backup on a stolen laptop is a privacy disaster.
- Do not interrupt the transfer. Keep the phone awake and plugged in. If the screen locks mid-import on Windows, some photos get skipped silently.
- Keep one offline copy. Cloud storage is great, but companies change terms and accounts get locked. An external hard drive with your photo backup, stored somewhere safe, is cheap insurance. A 1TB drive costs around $50 at Best Buy or Amazon.
What to Do Before Selling or Resetting Your iPhone
If the backup is happening because you are upgrading or selling, run through this checklist after verification: sign out of iCloud (Settings > your name > Sign Out), turn off Find My iPhone, unpair your Apple Watch, then erase via Settings > General > Transfer or Reset iPhone > Erase All Content and Settings. I have seen people skip the sign-out step and end up with Activation Lock headaches for the buyer, which is an awkward text message nobody wants to send.
The Bottom Line
Backing up your iPhone photos to a computer safely comes down to three habits: use a USB cable you trust, verify the import before deleting anything, and keep your backup encrypted. Do it once a month, it takes less time than scrolling social media, and you will never again feel that stomach-drop panic of a phone that will not turn on. Your future self, and your photo memories, will thank you.
Common Questions, Answered
How often should I back up my iPhone photos?
Ideally, back up continuously with iCloud Photos or Google Photos so every new photo uploads automatically over Wi-Fi. If you prefer manual computer backups, do it monthly. The photos you lose in a disaster are always the ones taken since your last backup, so shorter intervals mean less heartbreak. Set a monthly calendar reminder if you go the manual route. For step-by-step instructions, see Apple Support’s iPhone backup instructions.
Do I need iCloud storage to back up photos to my computer?
No. A direct USB import to your Mac or PC works entirely without iCloud and costs nothing. iCloud is convenient as an additional safety net, but the computer backup described in this guide is complete on its own. Many people use both: USB for the primary archive, iCloud for day-to-day convenience.
Will backing up to a computer delete photos from my iPhone?
Not unless you tell it to. Importing copies photos to the computer; your iPhone keeps its originals. Only check “delete after import” if you have verified the backup and deliberately want to free phone space. When in doubt, leave the box unchecked.
What format are iPhone photos saved in on a computer?
iPhones save photos as HEIC files by default, which Windows sometimes struggles to open. In iPhone Settings, go to Photos and set “Transfer to Mac or PC” to Automatic, which converts to compatible JPEG during USB transfer. On a Mac, HEIC opens natively with no issues.
Leave a Reply